Tagging Contacts
📽 VIDEO: How to Use Tags
Tagging Contacts in Reach
Tags in Reach aren’t just for tasks — they’re a powerful way to organize and categorize your contacts, helping you quickly find, filter, and act on the people in your database. Whether you’re managing clients, agents, or network partners, tagging keeps everything structured and easy to navigate. For instance:
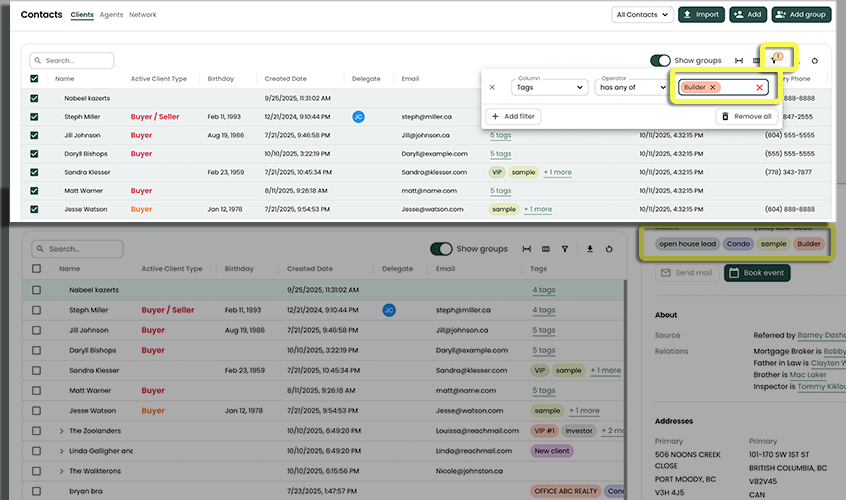
🚀 You're working with a builder and investor, you may wish to create a tag "Builder" and "Investor" and tag the contact both. If you ever need to send important information to your "Builder" tagged clients... you can tag filter (in Contacts) and send an email to that list.
How Tags Work on Contacts
Categorize Contacts: Assign tags to indicate client type, relationship, status, or any custom category you choose. Examples include
Buyer,Seller,Past Client,VIP, orInvestor.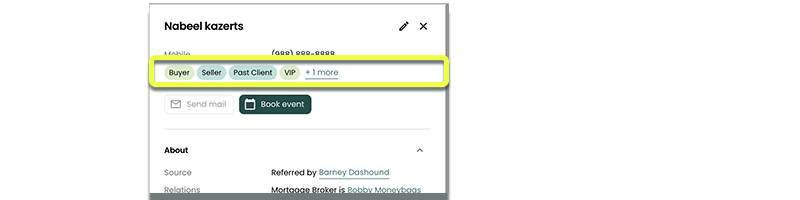
Filter and Search: Once contacts are tagged, you can filter your contact list to view specific groups instantly. For example, show only
Hot BuyersorPast Clientswho may need follow-ups.Customizable and Flexible: Tags are fully customizable to match your unique workflow. Apply multiple tags to a single contact for layered organization — e.g., a contact could be both
InvestorandVIP.Team Collaboration: In a team environment, tags make it easy for everyone to understand the status or category of each contact at a glance, and deal with clusters or groups of contacts.
Tags on a Single Contact
- In the sidebar, click on Contacts
- Select the Contact you wish to edit
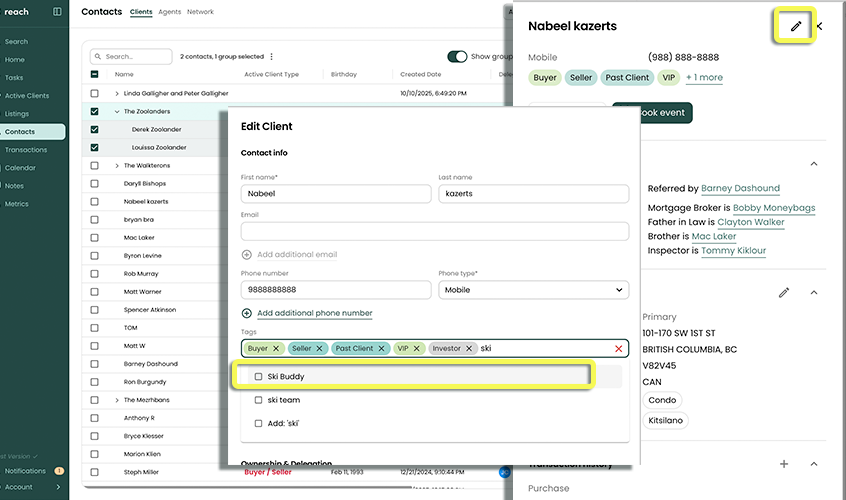
- Click the Edit button
- Find the Tags field and start typing to add a tag (previously used tags will show up as suggestions)
- Hit Enter or click to complete the tag
- Add one or more tags and click Save
These tags show up in the following locations:
- Contacts page
- Active Clients page
- Seller information for a Listing
- Buyer / Seller information for a Transaction
- Search Results
Add and Remove Tags on Multiple Contacts
It can be incredibly helpful to edit multiple Contacts at the same time.
For example, Perhaps you have some old tags that you want to update across multiple contacts. In this case, you want to changes your "Xmas Card (23')" tag, to a new "XMAS2025" tag:
In the sidebar, click on Contacts
Select the Contacts you wish to add or remove tags for by clicking the checkboxes.
tip🚀 Remember, you can tag filter all the old tags to surface the Contacts you want to update.
Click the Edit Tags button, from the heading section (...) 3-dot menu.
Add any new tags you wish to give to the selected Contacts
Select any existing tags you wish to remove from the selected Contacts
Click OK
Your contacts have been updated with the new tags

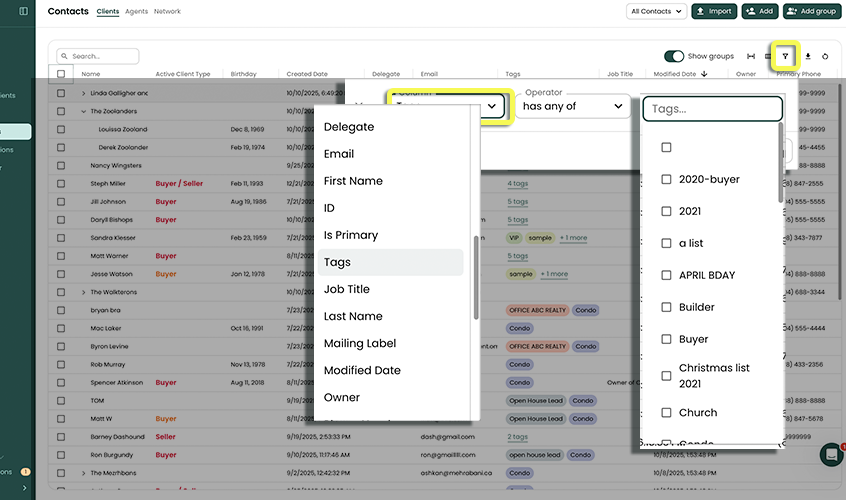
Searching for a Tag
In addition to searching for a Contact by name, you can also use tags. Whenever you see a list of Contacts that can be searched, you can also use tags to search the results.
You can also use the Search bar in the top banner to search for Contacts by tag, using Filter option (below image)