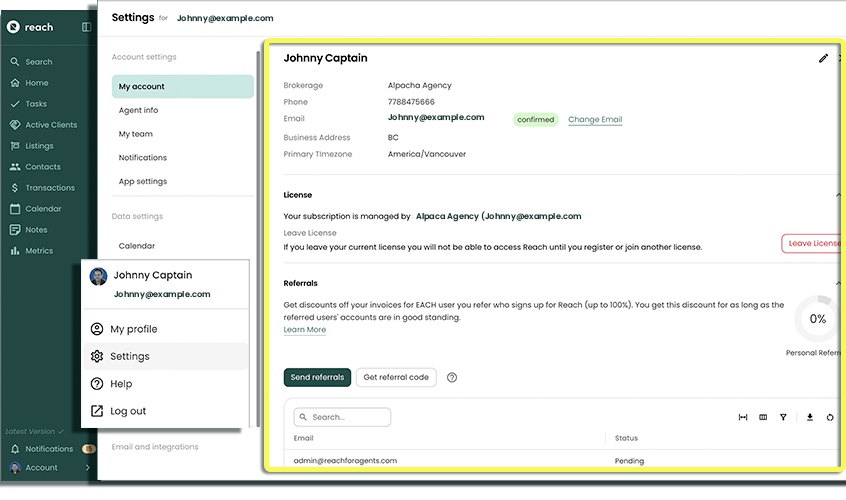
My Account
The My Account page shows basic information about your account. From here you can change your name, email address, mailing address, and manage your subscription.
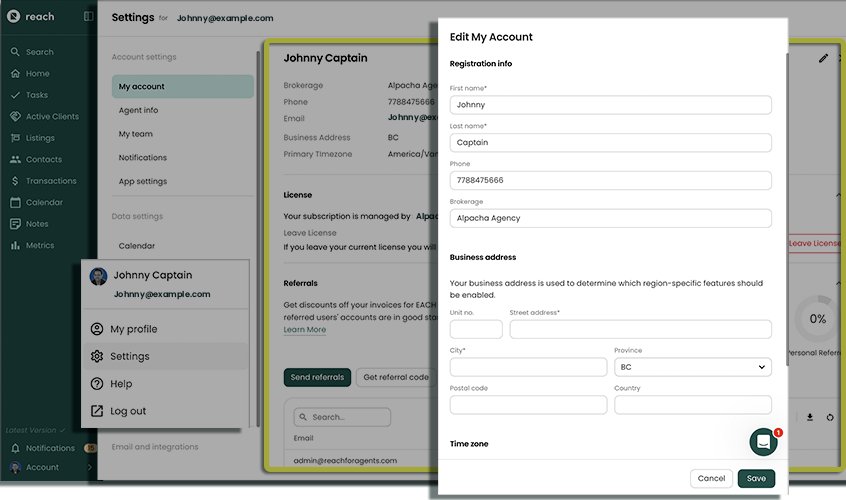
Edit Name and Mailing Address
To change the name of your Reach user or to change your mailing address, follow these steps:
- In the sidebar, click on Account, then select Settings
- Click on My account
- Click on the Edit (pencil icon) to edit the details.
- Change your First Name, Last Name, or Address and click Save
Change Email Address
Your Reach account is tied to your email address: your email address is used for logging in to Reach and receiving any email notifications.
For example, the email address that you use is specific to a certain brokerage and you are switching brokerages and wont have access to the old email address.
In order to change your email address you must reach out to our Support team.
If you are just wanting to change your email address so that you can send out email from a different email, you don't need to change your email to do it. Go to Account -> Settings -> Email to configure an email provider. Reach out to our team for further support.
Manage Your Subscription
If there is a discrepancy between the dollar amount shown in Reach and your invoice, the invoice is correct.
The License section of My Account shows your current license information. From here you can view, update or cancel your subscription.
If someone is paying for you then your account will look like this:
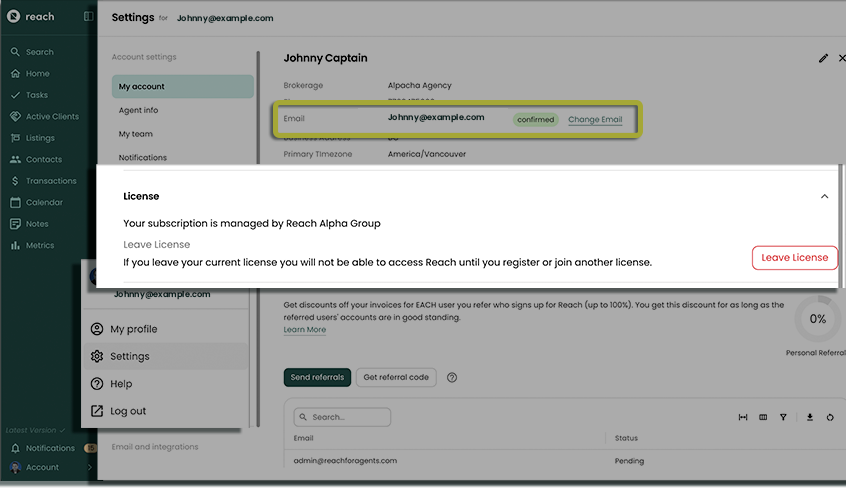
If you are paying for yourself then your account will look like this:

Managing License Members
Reach lets you pay for multiple license seats, so you can cover the cost of Reach for your team. You’ll be the license holder, and each user occupies one seat.
All users on your license will appear in a table showing their name, date joined, and an option to remove them from your license at any time.
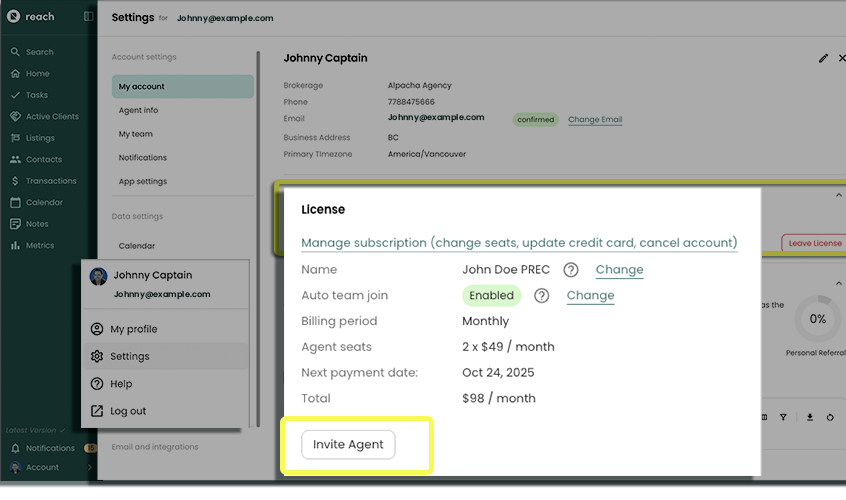
Adding License Members
The following process creates a generic link that anyone can use to join your license. If you want to create a special invite link that is tied to a specific email address (i.e. only that email address is allowed to register using that link), follow the instructions in Paying for a New Team Member
You can add either an Agent or an Admin user(s) to your license. Follow the steps below:
- In the sidebar, click on Settings
- Click on My Account
- Expand the License section
- Click on Invite Agent or Invite Admin
- Send the copyable link to the users you wish to join your license
- Tell users to use the link and go through the registration process, and register.
When users register with Reach using this special link, they will not be prompted for a credit card but rather use one of your license seats. If you do not have any open seats in your license, they will not be able to register. To open up seats for more users, update your subscription to pay for more license seats.
The link contains a special code that allows users to join your license. We recommend periodically refreshing the code to invalidate any previous links that have been sent out. Refreshing the code is available in the Invite Agent / Invite Admin dialog. The Invite Admin button only appears if you have more than 0 Admin seats.
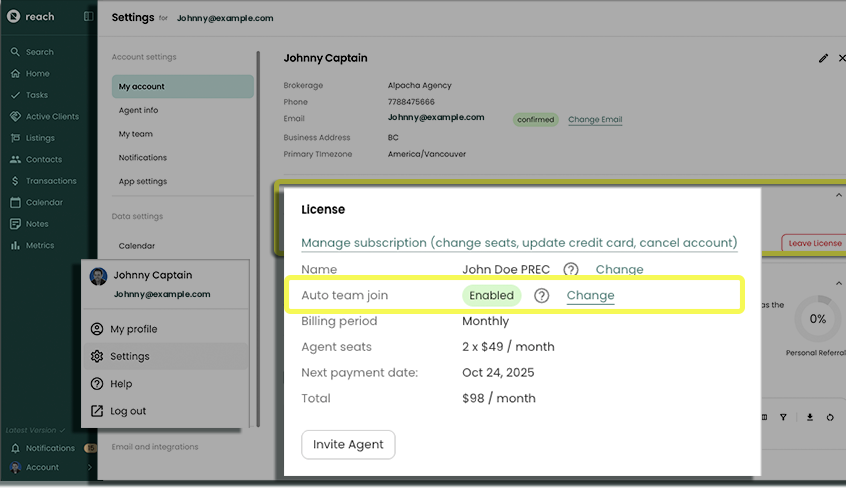
Auto Team Join
Any new user you pay for is automatically added to your team when they join your license. No data is shared at this point—they’ll simply appear in your My Team list.
When Auto Team Join is enabled (before you send out codes), the new user is also automatically added as a team member for everyone else on the same license. This is especially helpful for larger teams—like when a new admin joins—since they’re instantly connected to the entire group without any manual setup.
From there, each team member can set or adjust Permissions for the new user as needed.
- Refer to Permission Settings for more information on setting up privacy permissions, per user.
Removing License Members
For whatever reason, you may wish to not pay for a Reach user any longer.
- In the sidebar, click on Settings
- Click on My Account
- Expand the License section
- Click the remove button associated with the Reach user
The user will be notified that they are no longer part of your license and will have to register a credit card in order to continue using Reach.
Simply removing a member does not lower the number of seats on your license; i.e. removing a member does not lower your bill. If you do not wish to give the open seat to someone else, update your subscription and lower the number of seats you are paying for to decrease your bill. Any changes to your subscription will appear on the next invoice.
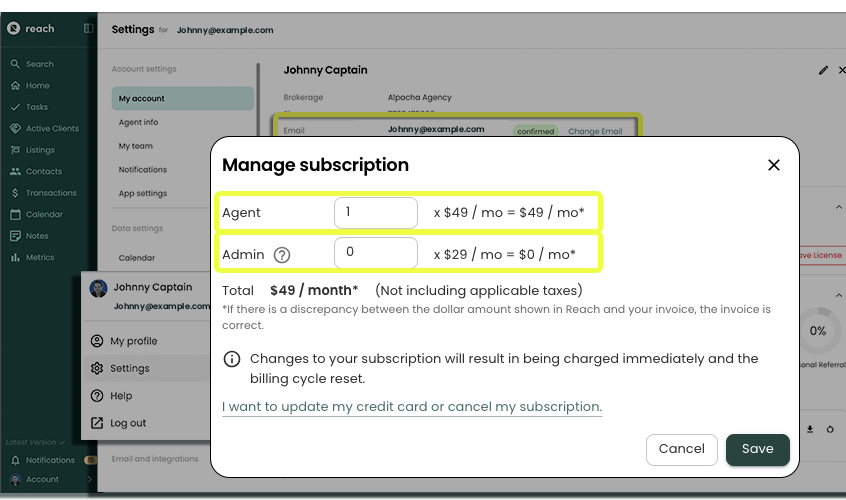
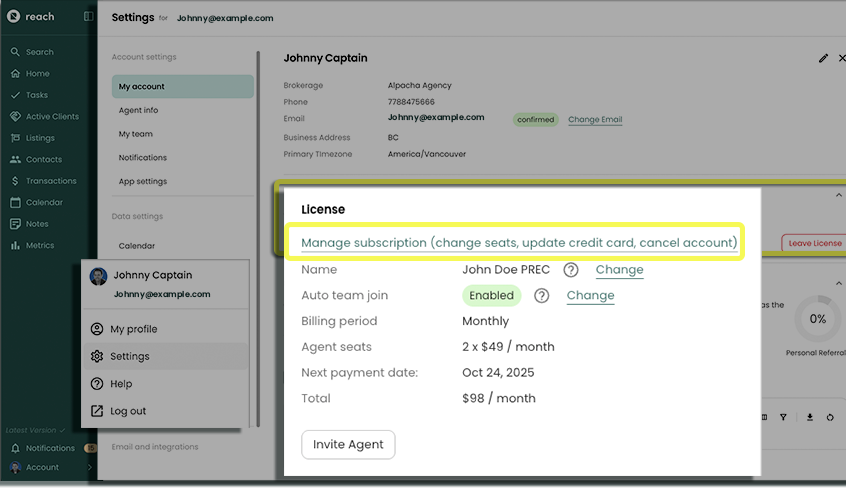
Updating Your Subscription (Or Credit Card)
When you update your subscription or need to update your Credit Card you have the option to change the number of seats you are paying for.
When changing the number of seats you are paying for, the minimum number of seats is set by the number of people currently using the license. In order to lower the minimum, remove license members before trying to reduce the number of paid seats.
In order to update your subscription or CC, follow the steps:
In the sidebar, click on Account and Settings
Click on My account
Expand the License section
Click on Manage subscription (change seats, update credit card, cancel account)
Here you can Add more Seats for Agents or Admin Accounts
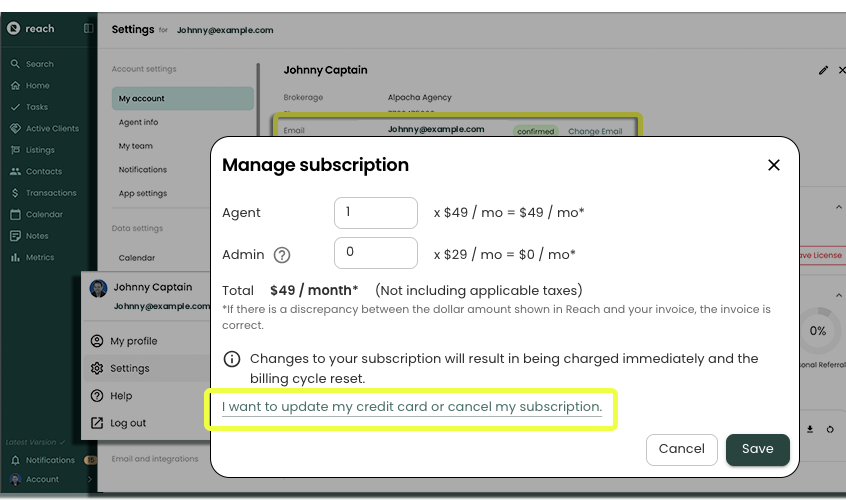
Update Credit Card, click "I want to update my credit card or cancel my subscription"
Make any applicable changes
Click Save
Any changes in price will be billed immediately and will reset the billing period
Changing Your Credit Card
Stripe is the 3rd party payment software that Reach uses to administer credit card payments.
Reach uses Stripe for our credit card processing. To change the credit card in the Stripe portal, follow the steps below:
In the sidebar, click on Account
Click on Settings
Expand the License section
Click on Update Subscription
Click on I want to update my credit card or cancel my account (this will open a new browser window)

Under Payment Methods, select "+ Add payment method"
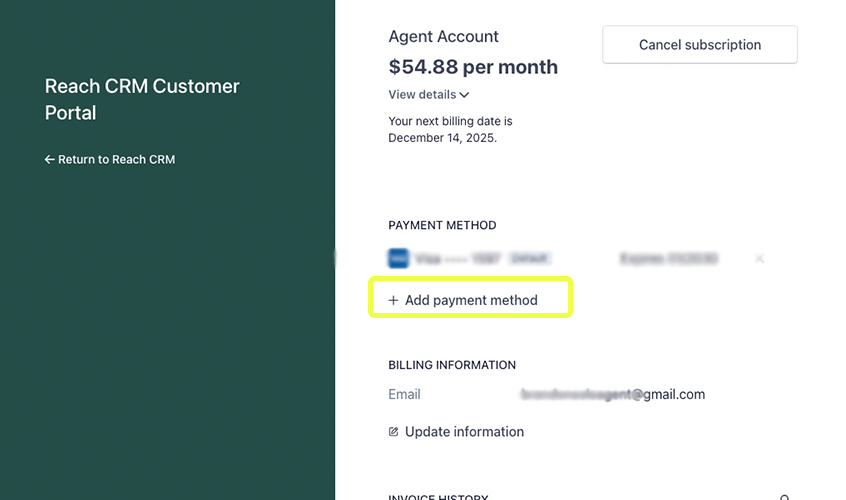
Remove any old or inapplicable credit cards
Close the portal
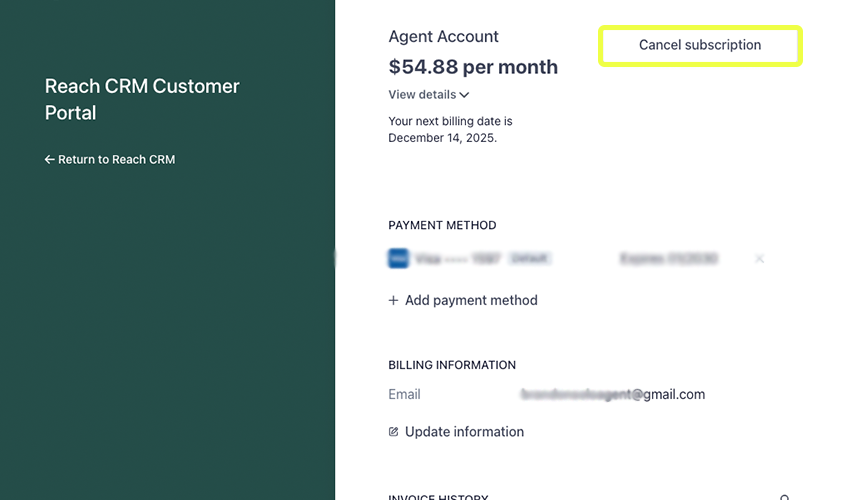
Canceling Your Subscription
We are sorry to see you go! If you would like to cancel your Reach subscription, follow the steps below.
- In the sidebar, click on Settings
- Click on My Account
- Expand the License section
- Click on Manage Subscription (change seats, update credit...)
- Click on I want to update my credit card or cancel my account (this will open a new browser window)
- Click Cancel Plan
- Click Cancel Plan again on the confirmation screen
Your account is still available until the end of the billing period. If you would like to renew your subscription before the billing period is up, follow steps 1-4 above and click on Renew Plan. Even after the billing period is over, you can still re-register at a later time and all of your data is preserved.
Referrals
Reach offers a referral program that gives you the chance to get Reach for free—just by referring others! The discount amount is detailed for Individuals and Teams below.
Better yet, it’s a win-win: anyone you refer also receives a sign-up discount.
For each new paying user you refer, you’ll receive a recurring discount on your invoice. This discount stays active as long as the referred user’s account remains in good standing (valid credit card on file and payments up to date).
To view your current referral progress, do the following:
- In Reach, click on Account the sidebar and then on Settings
- Click on My profile
- Expand the Referrals section
- Observe the pie chart providing your personal progress towards referring 10 users
For invoice purposes, Reach will calculate your discount 2 days in advance of your invoice. For example, if you are normally charged on the 18th of the month, Reach will provide a discount based on your referrals as of the morning of the 16th.
Individuals
When just paying for yourself, Reach provides a 10% discount for each user. This means that if you sign up 10 other people, you get Reach for free as long as they continue being paid users of Reach. The maximum total discount is 100%.
Teams
When paying for a team of users, Reach will give a free invoice if your team signs up 10 users per paid agent user. For example, if you are paying for yourself and 2 other agent users, your team needs to sign up 30 people to get a free invoice. In this example, the discount per user is around 3%. The maximum total discount is 100%
Anyone on a team (whether they are the paying user or not) can refer new users to Reach. If they do, the discount is applied to the person paying for the license. This means that although you may need to sign up 30 users to get a free invoice, any users that your teammates sign up get counted towards your invoice.
When users no longer work together as a team, they take their referrals with them and that user's referrals no longer count towards the team's invoice.
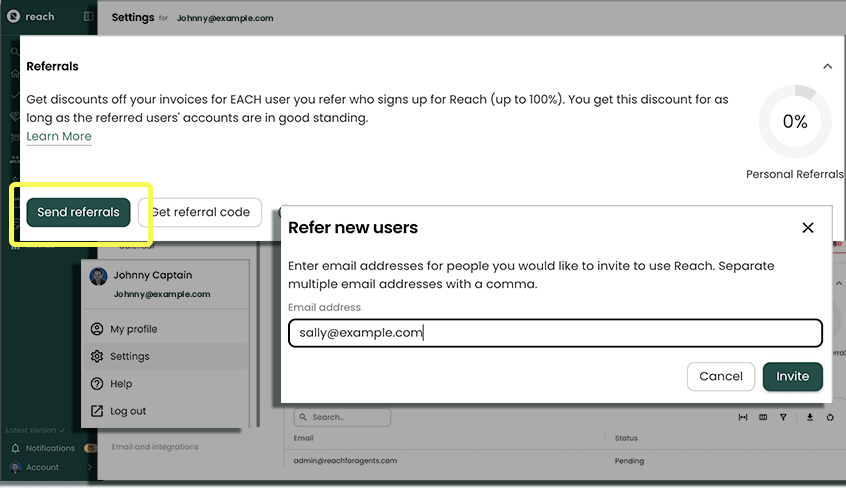
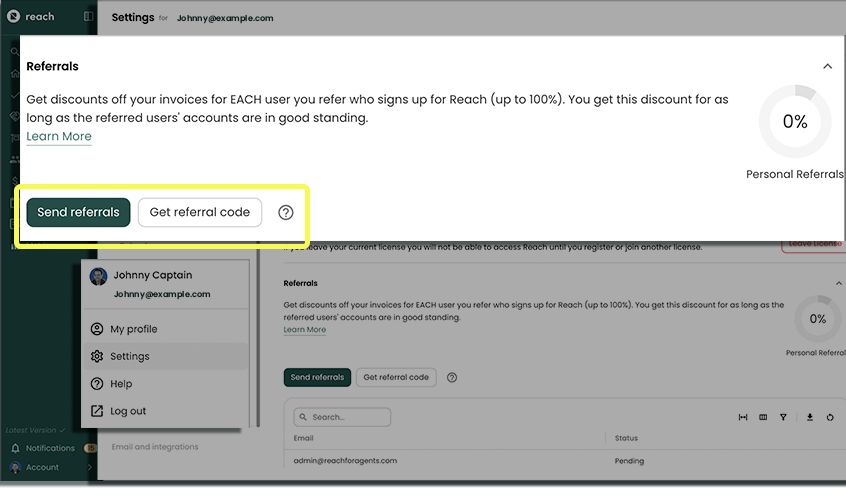
Viewing and Sending Referrals
The Referrals section can be used to see your current referrals and send out new ones. Your current referrals are separated into Pending and Accepted. Only Accepted users count towards your discount.
There are two primary ways to send referrals: Generic Referrals with a code, and email-specific referrals.
Generic referrals are referrals that can be used by anyone. These kinds of referrals are good for social media posts where you don't know the email addresses of the users that will sign up ahead of time.
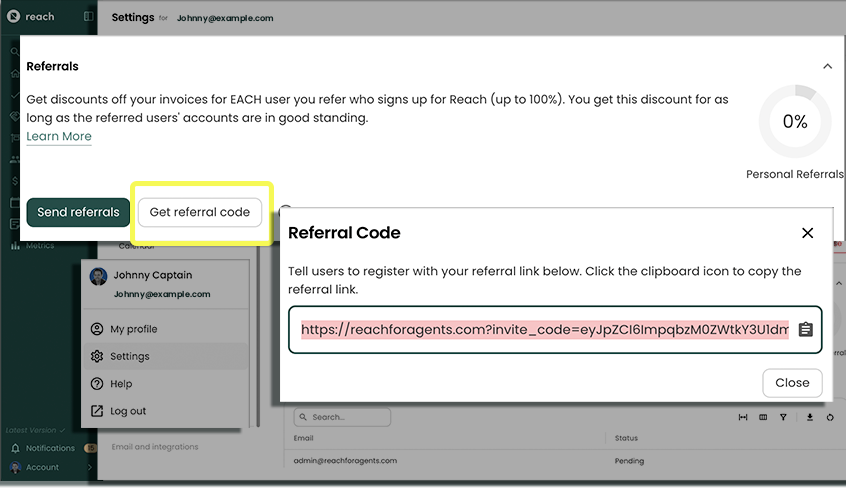
To access your generic referral code, do the following:
- In Reach, click on Settings
- Go to My Account
- Expand the Referrals section
- Click on Get Referral Code
- Click on the clipboard icon to copy the URL
- Paste the URL in your message and invite people to register using your link. If they do, they will get a 10% discount.
Any new users you sign up will get 10% off when they register.
To send email-specific referrals, do the following:
- In Reach, click on Settings
- Go to Account, then Settings, then My Account
- Expand the Referrals section
- Click on Send Referrals
- Enter the email addresses of those you wish to refer. Enter multiple addresses by separating them with a comma
- Click Invite