My Team & Permissions
In the My Team section, quickly add or remove team members, change the permissions of what your team members can do with your data, and filter out which data from your team members you don't want to see.
Team Members
Read Intro to Teams for an introduction to the concept of teams.
Paying for New Team Members
If you are a paying Reach user, you can pay for other users' accounts. Paying for a new user automatically adds them to your team.
You can only pay for new Reach users. If you wish to pay for an existing Reach user, that user must first either cancel their subscription or leave their current license.
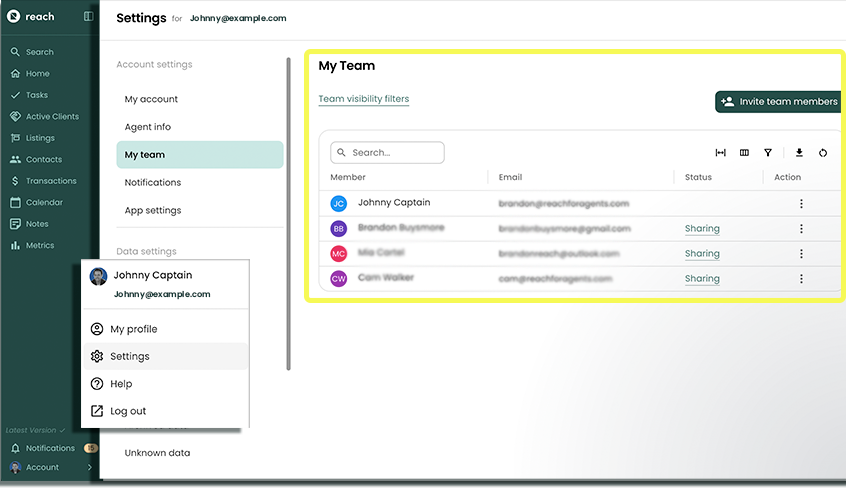
- Navigate to Account (bottom of navigation bar) then Settings, then select My Team
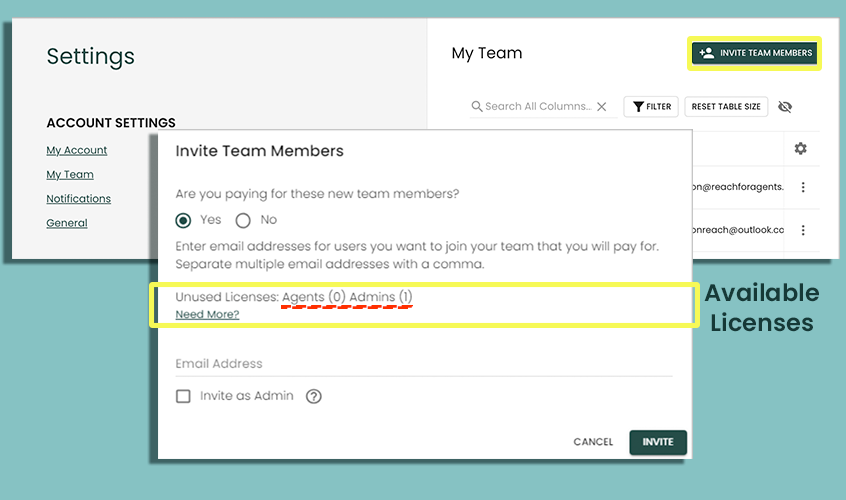
- Click the Invite Team Members button
- Select the radio button indicating that you will pay for the new users
- Enter the email addresses of the new users (these must be a Google or Microsoft email address)
- Decide whether you want to invite them as an Agent account (default) or as an Admin account (requires you to check Invite as Admin)
- Click Invite
Click the Need More? link if you need to purchase more licenses before you pay for other users.
Inviting Team Members
Inviting a Reach user to your team is done via invitation. This option allows you to invite a current Reach user (someone else paying for themselves) or someone that is new to Reach.
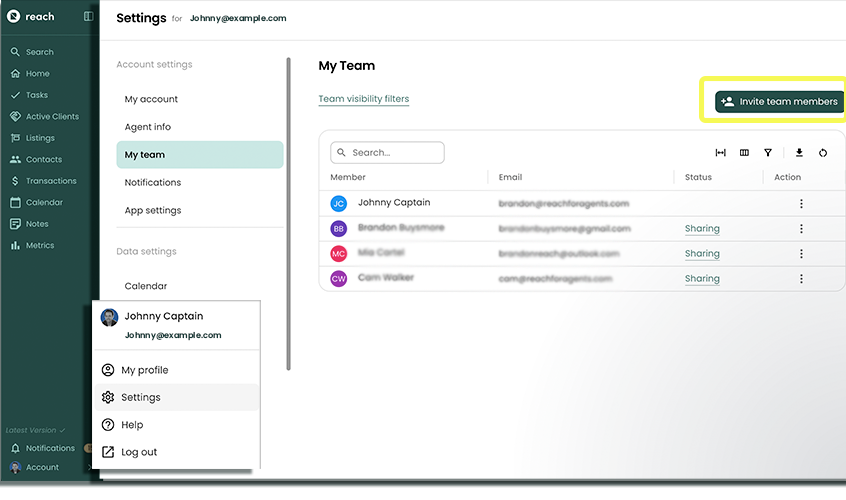
- Navigate to Settings > My Team
- Click the Invite Team Members button.
- Select the radio button indicating that you will not pay for the new users
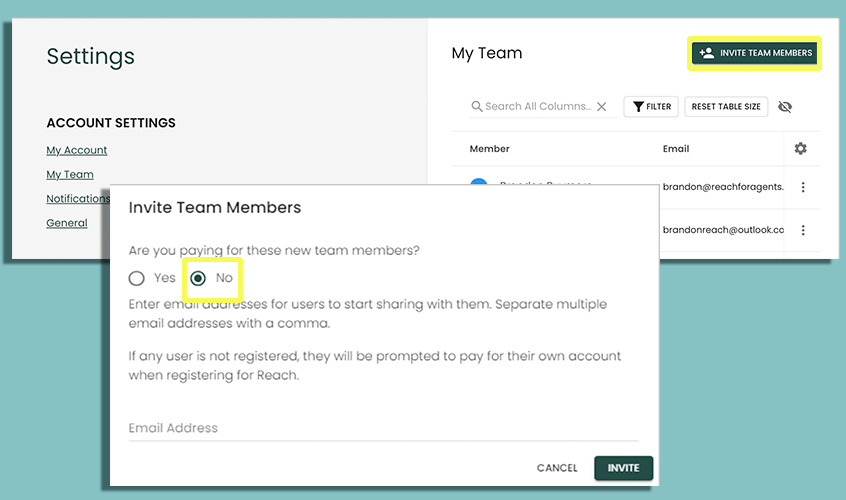
- Enter the email addresses of the people you wish to invite to your team and click Invite.
In the event that the invited user is not yet a registered Reach user, the system will instead send them a registration invitation. Once registered, the new user will automatically be on your team unless "Automatic Team Joining" is turned off.
Manually Joining a Team
Existing users (or new users who didn't automatically join the team) must go through the following process to join the team:
- The user will receive a Reach invitation email / notification from a team member.

- The user logs in to Reach (or can click the "View Invite" in the email they received, Click their Account >> Settings >> My Team
- The user clicks the 3-dot (...) menu for the row of the user that invited them
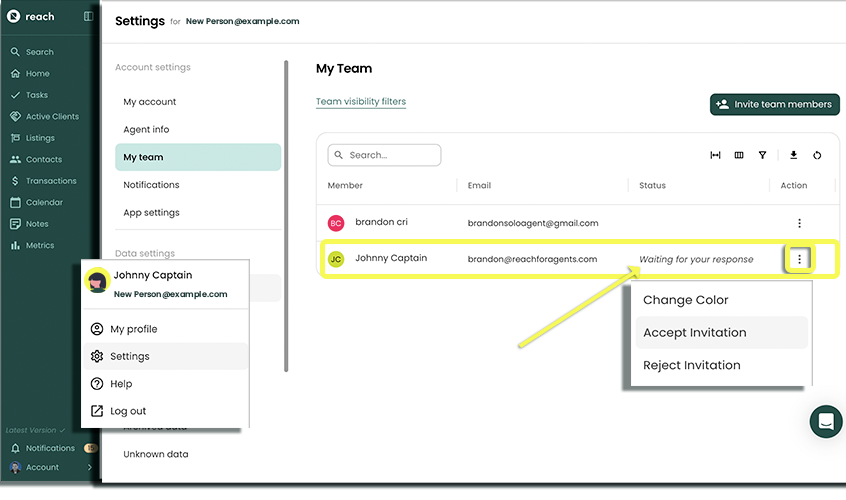
- The user selects Accept Invitation
Reach may send you a notification (based on your settings) that the invited user has accepted your invitation
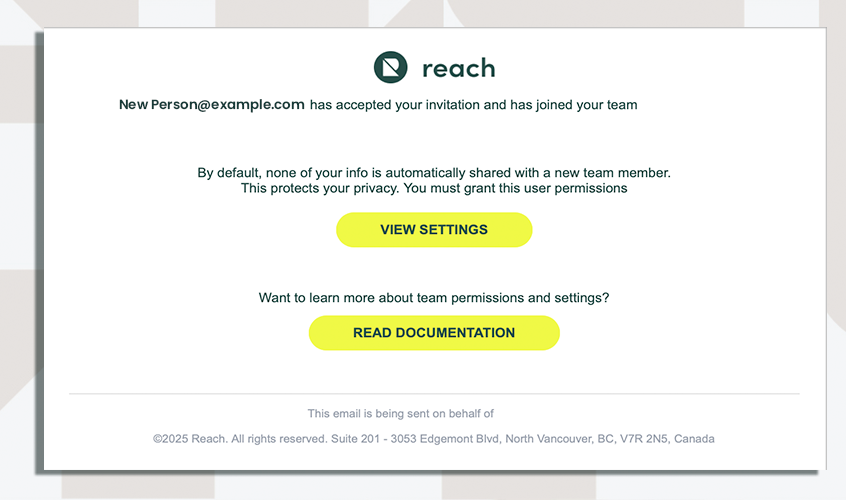
New Team Members initially start with no permissions. Click on Set Permissions in the user's row to start assigning permissions.
Set Team Member Permissions
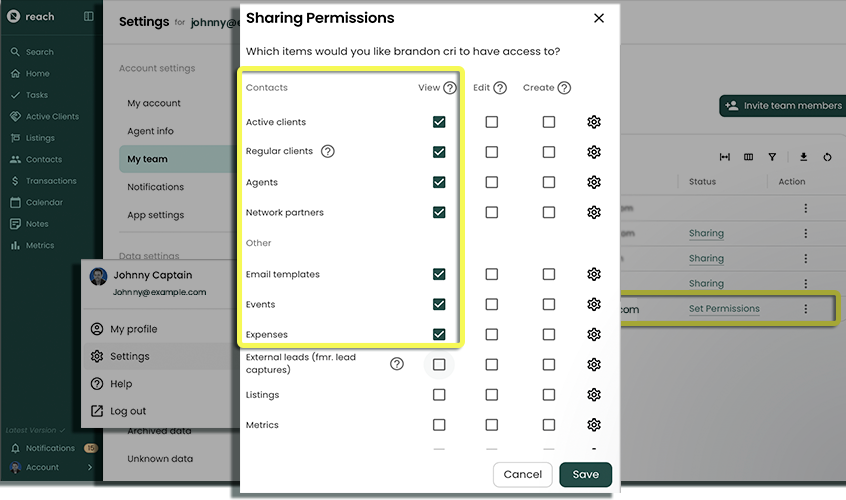
Sharing within Reach is granular and configurable. Granting a team member access to specific items does not automatically provide them access to other items. For example, a team member may be granted read-only access to Listings for reference purposes without permission to modify them.
By default, new team members have no shared access. Permissions are item-specific and can be configured individually per team member, enabling precise control over visibility and edit rights across Contacts, Listings, Transactions, Events, Tasks, and other Reach objects.
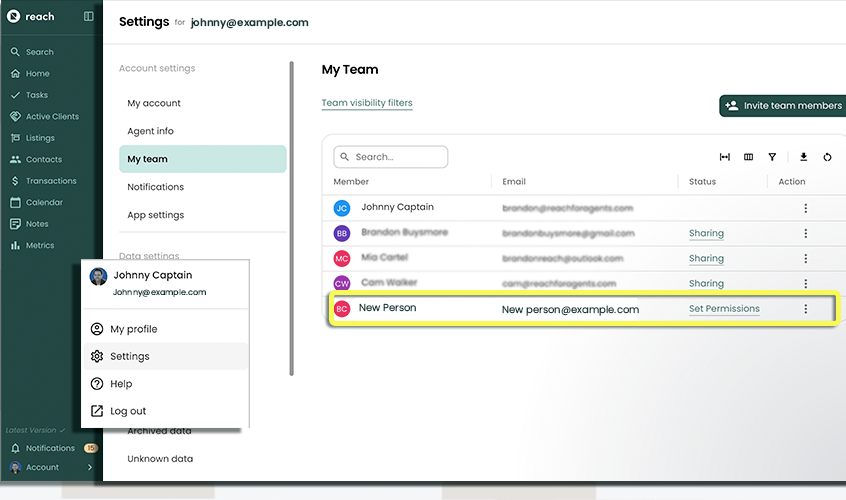
- Go to Account (sidebar), select Settings, then navigate to My team.
- Click on the Set Permissions or Sharing link inside the "Status" column for a specific team member.
- Set permissions as appropriate and click Save

🚀 Giving a team member "edit" permissions allows them to archive your items in which case you may get a notification (based on your settings). Archived items can only be restored or permanently deleted by you.
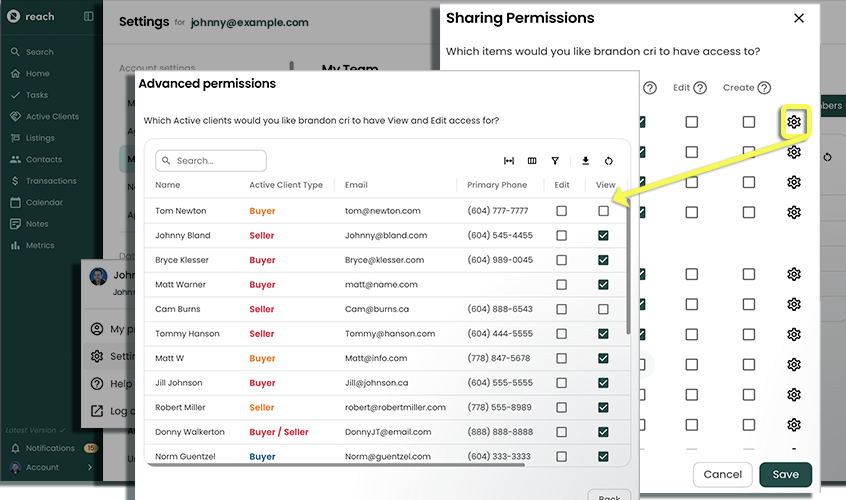
EXAMPLE OF VIEW ACCESS ONLY:
In the permission settings shown below, the current user has granted this team member view-only access to their items, without the ability to edit or create new items. Additionally, External Leads, Listings and Metrics remain unchecked, meaning this user will not have visibility into any of that data.
In the below permission, it can be seen that the current user has decided to let this user view their items, but not let him edit or create new items. Secondly, any Transactions/Commission info and External Lead details have been left unchecked, meaning this user will not be able to see any of that info.
Granular Control over Specific-Sharing Items
Usually, setting permissions on an entire category of item will be sufficient. However, if you need more granular permissions, click on the gear icon to set the permissions for individual items within that category.
This allows you to individually set the view and edit access on a per-item basis.
For more information regarding permissions for Transaction commissions, refer to Who Sees Commissions?
Multiple Permissions
There are certain scenarios that require multiple permissions to be set in order to complete an action.
Common Examples
- Booking an Event associated with a Client, Listing, or Transaction. A team member must have "create" access in order to create the Event but must also have "edit" access on the item itself (i.e. the Client, Listing, or Transaction).
- Adding a Touchpoint for an Active Client requires "create" access for Touchpoints and "edit" access on the individual Active Client
- Removing subjects on a Transaction requires "edit" access on the Transaction as well as "create" access for events (as the possession and completion dates for a Transaction are made into Reach events)
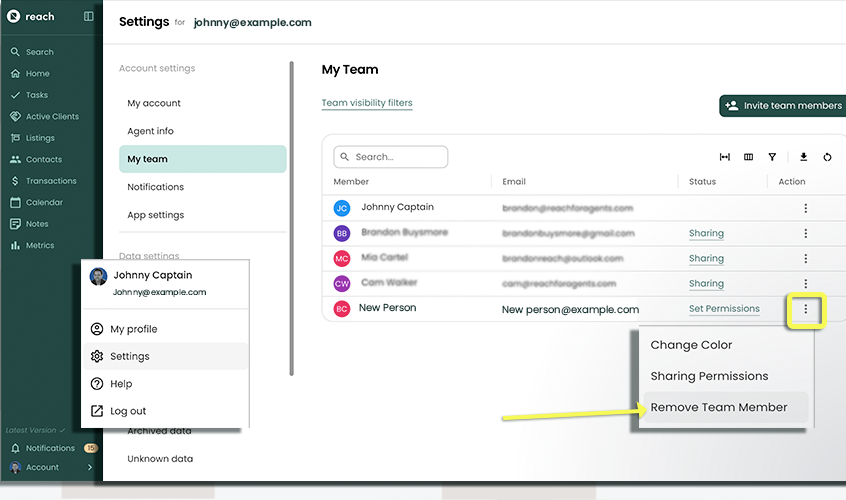
Remove a Team Member
Sometimes you wish to no longer work with someone else. To remove that person from your team so they no longer have access to your data (and you no longer have access to theirs), follow the steps below:
- Go to Settings > My Team
- Click the 3-dot menu for the user you want to remove
- Select Remove Team Member
- Confirm the prompt, You will no longer be sharing with this user.
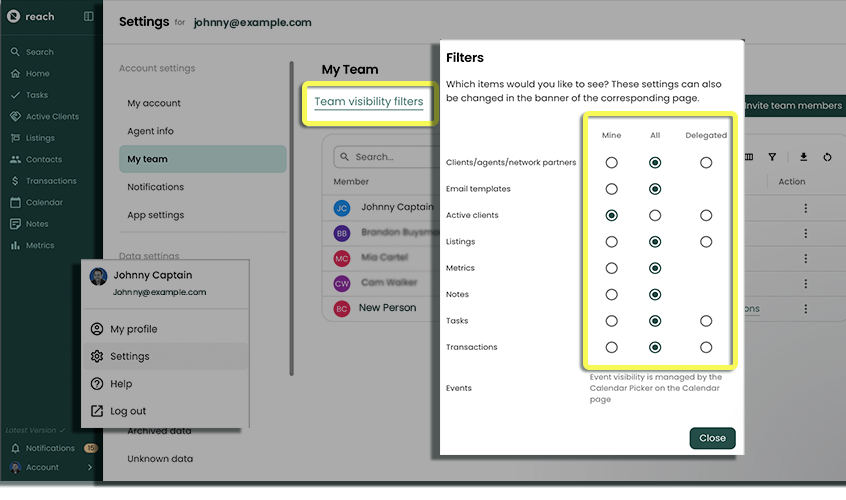
Filters (See Team Stuff, Your Stuff)
When working with team members, sometimes it can be convenient to only focus on your own items instead of seeing everyone's items.
The filters can be configured in two different places:
- Settings >> My Team and then clicking on the "Team visibility filters" icon in the table header, as shown below. This option sets all the visibility filters for each page within Reach. This is a good place to start, you can always change the views section-by-section within Reach.
- The banner on the Tasks, Active Clients, Listings, Contacts, Transactions, and Calendars pages, section-by-section
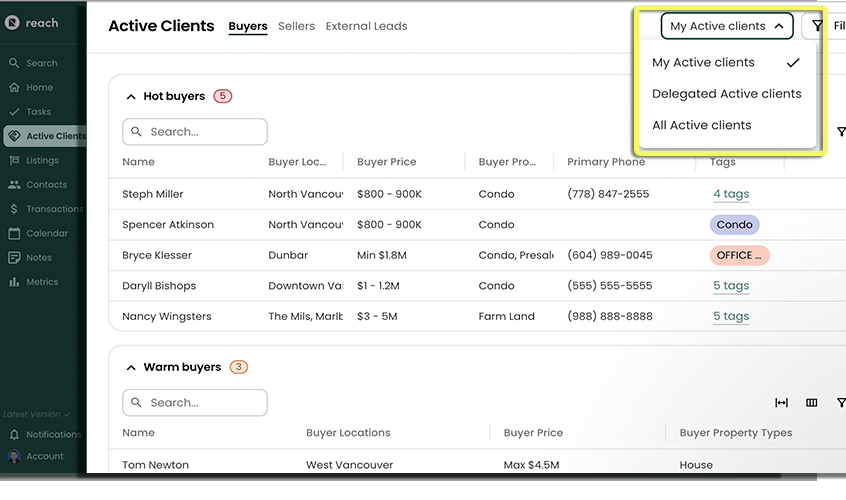
- "My" is everything that is owned by and delegated to you.
- "Delegated" is everything that is owned by you but delegated to someone else.
- "All" is everything you have permission to see (yours and your team mates')
User Color
Each team member, including yourself, has a color. This color is only for your benefit, your team members have their own colors for you and for themselves.
The colors help quickly identify the owners of events in the Reach calendar, as well as assist in showing the owners and delegates of items throughout Reach.
- Go to Settings -> My Team
- Click on the coloured circle associated with a team member
- Select a new color and click away to select the color