Groups
Sometimes it’s helpful to group Clients (e.g., a married couple) so they’re treated as a single unit. Creating a Group ensures your Reach history is linked to all members without adding each Client separately to Listings or Transactions.
Additionally, If (and when) a Group were to suffer a divorce or break-up, the data stored to the group gets written to each Contact - Thereby maintaining your system information... keeping you organized.
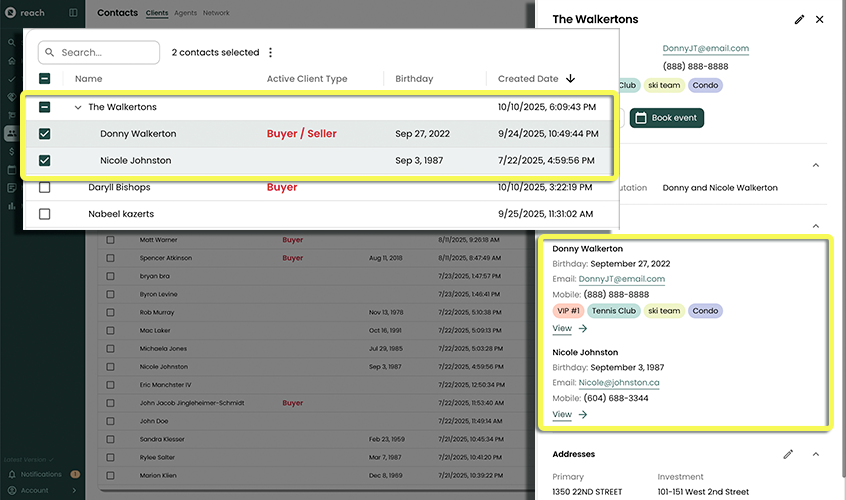
The first Client in the Group is regarded as the Primary Client. This means that their contact information (email and phone) is elevated and displayed as the Group's contact information.
Creating a Group
- In the sidebar, click on Contacts
- Click on Add Group (or alternatively, pre-check multiple Clients in the table and click Add Group)
- Enter the Group's Title
- Optionally specify the Active Client Type and Active Client Score
- Add at least 1 Client to the list of Clients
- Add any applicable Addresses for the Group (these should be addresses that everyone in the Group owns or lives at)
- Click Save
Removing a Client from a Group
Sometimes you need to remove a Client from a Group. The removed Client will get a copy of the Group's history so that it isn't lost. An automatic Note is also added to the Client saying the time that they were removed from the Group.
The removed Client is added as an additional Client on any of the Group's Listings or Transactions - this is how they retain the Listing and Transaction history. In addition, any addresses that the Group gained or lost is also transferred to the removed Client.
- In the sidebar, click on Contacts
- Click on the Group from which you wish to remove a Client
- Click the Edit button
- Remove the Client (or Clients) from the list
- Click Save