Mailing Label Exports
Reach provides a targeted experience to export a Mailing Label CSV file that can be used to easily generate mailing labels.
Mailing label export is only available on Desktop (i.e. not available on Mobile)
Preparing Your Data
Reach uses the First + Last Name of a Contact as the “Name” field in the CSV file generated for Avery Mailing Labels. This column ("name") determines the salutation line used on the mailing label.
For Groups, the Group Name is used by default unless a custom Mailing Label Salutation has been set.

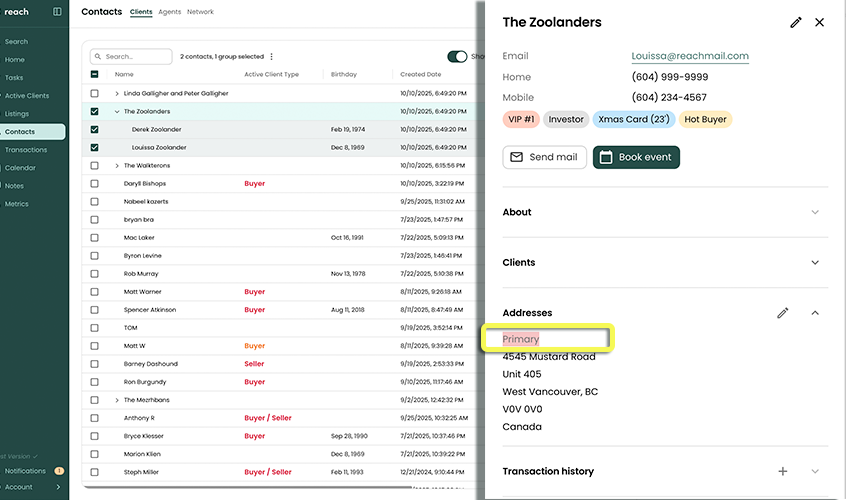
Only addresses marked as Primary (not Investment) are included in the mailing label export, ensuring your labels use the correct recipient and address every time.
Groups
Mailing Label Override
By default, Reach will generate a single line item for a Group and then use the title of the Group as the "name". There are instances however where you may wish to print a different name on the label. For example, you may have a Group called "The Zoolanders" in Reach, but on the mailing label, you wish to print the name "Derek & Louissa Zoolander".
To change the name that appears on the label:
- In the sidebar, click on Contacts
- Select the Group you wish to edit
- Click the Edit button
- Set the Mailing Label Salutation value
- Click Save
This value will now be used when exporting mailing labels.

Splitting a Group
Sometimes the members of a Group don't live at the same address and therefore it doesn't make sense to send a single piece of mail to one address. Instead of sending the Group a single piece of mail, you can designate that each Client in the Group be sent mail to their primary address instead.
To set that each Client of a Group should receive their own mail:
- In the sidebar, click on Contacts
- Select the Group you wish to edit
- Click the Edit button
- Check Each Client Receives Separate Mail in the Clients section
- Click Save
You cannot generate a mailing label for both the Group and each member of the Group
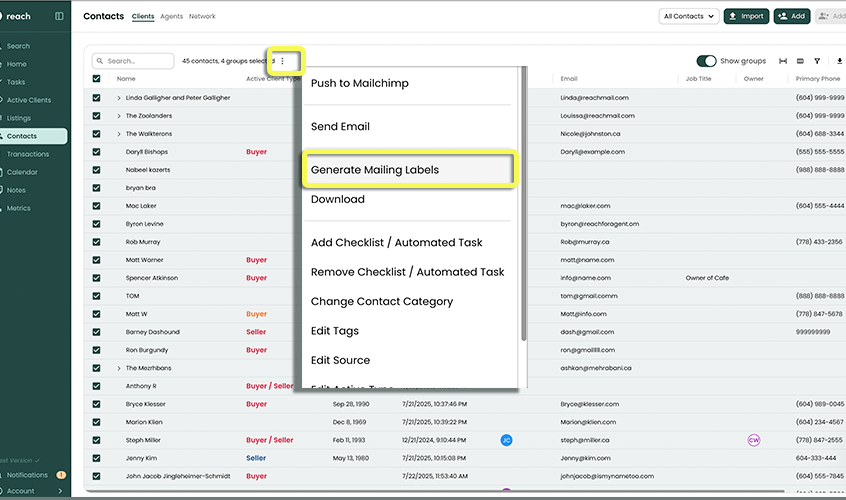
Mailing Label Export
When exporting your mailing labels, Reach provides a simple wizard that lets you review and edit your data before you export your file.
In the sidebar, click on Contacts
Select the Contacts you wish to generate mailing labels for and click on the hidden (...) 3-dot menu in the header, select Generate Mailing Labels
The Mailing Label Export dialog is shown

Validation
Reach will review all of your selected Contacts to see if they have valid addresses that can be used as a mailing label. Reach will provide a summary for each Contact and they will be put into one of the following categories:
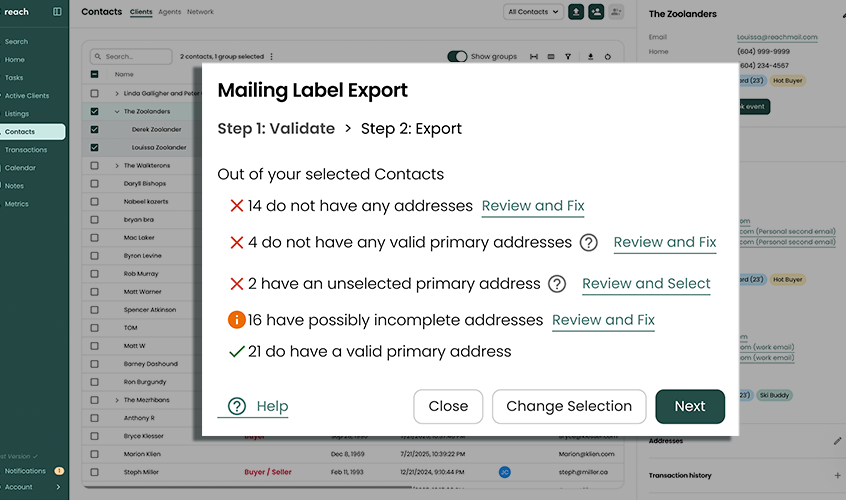
- Contacts that have no addresses
- Contacts that do not have any valid addresses marked as "primary" (although they may have "investment" or "unspecified" addresses)
- Contacts that have more than 1 valid primary address
- Contacts that have exactly 1 valid primary address
A "valid" address is an address that has street, city, postal, and province information. If the country is specified as any other country besides Canada, the province is not required.
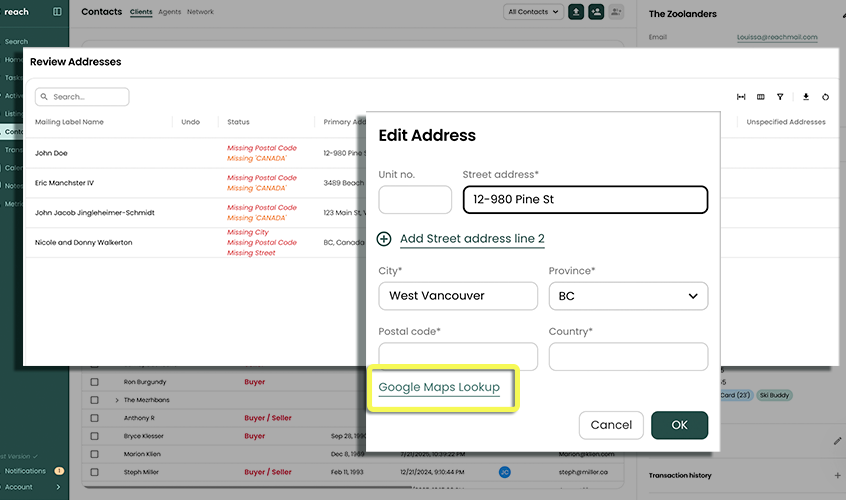
Review and Fix
For Contacts that don't have any addresses or an address that is primary, a Review and Fix link is shown. Clicking on this link brings up a dialog that allows you to review and edit your Contacts' addresses. For each row, a validation message shows what is wrong for each row (e.g. Missing Province); multiple messages may be shown for a single row. When resolving the issues for each row, you can do the following:
- Create a new address
- Edit an existing address
- Remove an address
- Convert an Investment or Unspecified address to a Primary one (and vice versa)
- Add a missing address from a historical Purchase Transaction
- Add a missing address from the Primary Client (groups only)
Any changes that you perform in this dialog are permanently saved to your Reach Contacts once you click Save and Close
While making changes, you can undo changes for any Contact by clicking on the Undo icon for that Contact
Google Maps Lookup
Sometimes it can be difficult to remember parts of an address, most commonly the postal code. In the Add / Edit Address dialog, a "Google Maps Lookup" link is shown. When you click on this link, a new browser window is opened to Google Maps and the address you were editing is automatically searched. From here you can easily grab the postal code (or other pieces of missing information) and put it back into Reach.
Review and Select
For Contacts that have multiple valid primary addresses, a Review and Select link is shown. Clicking on this link brings up a dialog that allows you to review and edit your Contact's addresses. The only thing required here is to use the radio buttons to select which primary address should be used for the mailing address export as only a single mailing address can be used per Contact.
Using the radio buttons to select a primary address does not change your Contact's data; it merely selects which address to use for the export
Export
You don't have to fix all of your Contacts' addresses before you export. The Contacts with incorrect or incomplete addresses are simply ignored.
A download link is shown that allows you to download a mailing label CSV file. This file contains only the information required for mailing labels (a name and address fields).
Generating Avery Mailing Labels
Avery mailing labels are among the most popular mailing labels that people use. Avery has a free online tool that you can use to generate a mailing label PDF that can be used with their sheets of mailing label stickers
- In a new web browser, go to https://www.avery.ca/en/design-and-print-online
- Click on Addressing & Shipping Labels
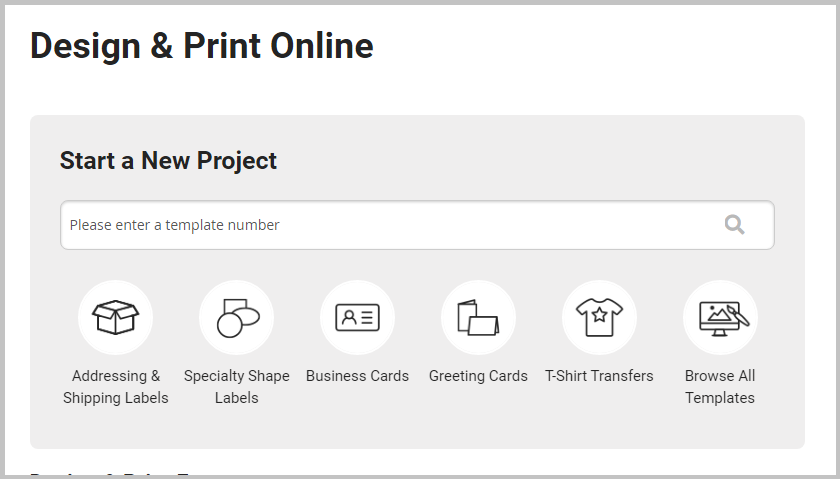
- Search for your numbered template or select it from the list
- Select your preferred design
- Once the editor appears, click on Import Data and Mail Merge in the left sidebar
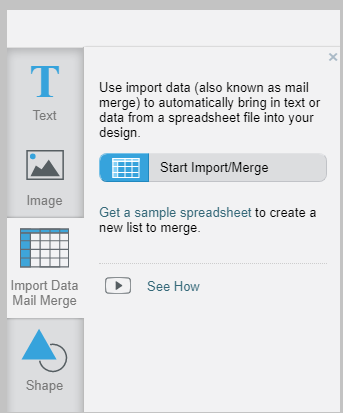
- Click on Start Import / Merge
- In the dialog that appears, click Browse for File
- Select your Reach Mailing Label Export CSV file (default called reach_contacts_mailing_labels.csv)
- Once returned to the dialog, deselect the first row is it contains only the column headers
- Click Next
- Click and drag the fields onto the label and click Next
- Review the instructions in the "Finish" step and click Finish
- Once satisfied with your mailing labels, click on Preview and Print