Seller Portal Settings
The Seller Portal is a client-facing, customized web interface that gives your Sellers a dedicated window into everything you're doing for them — showings, open houses, documents, InfoPack activity, and more. Before inviting any sellers, configure your branding so they land on a polished, professional experience that reflects your identity.
The Seller Portal requires a Pro subscription and is automatically available to all Pro users. If you are operating in a brokerage/commercial plan, you may be required to upgrade to Pro subscription.
Navigate to Account → Settings → Seller Portal to access the configuration
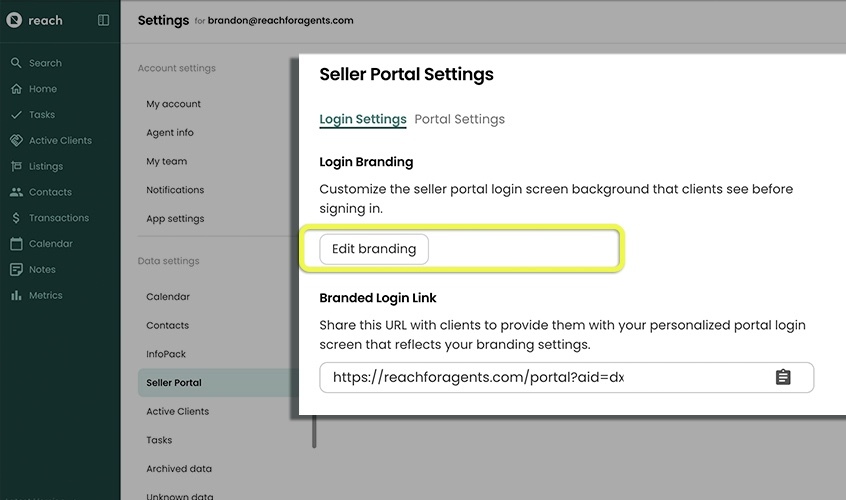
Login Settings
The Login Settings tab controls the background of the seller's login and registration page — the first thing a seller sees before they sign in.
- Click "Edit Branding"
Choose one of three options:
- Solid Colour — Pick a hex color from the color picker. That color fills the entire login screen background.
- Background Image — Upload a custom image (16:9 aspect ratio). A built-in crop and resize tool is provided. The image fills the login screen background.
- Default — No custom background; the portal uses its default styling.
- Click Save
Branded Login Link
Once you save your branding settings, a read-only field displays your personalized portal URL. This is the link you can share with sellers so they land directly on your branded login screen. Click the copy icon next to the URL to copy it to your clipboard — a "Copied to Clipboard" tooltip confirms the action.
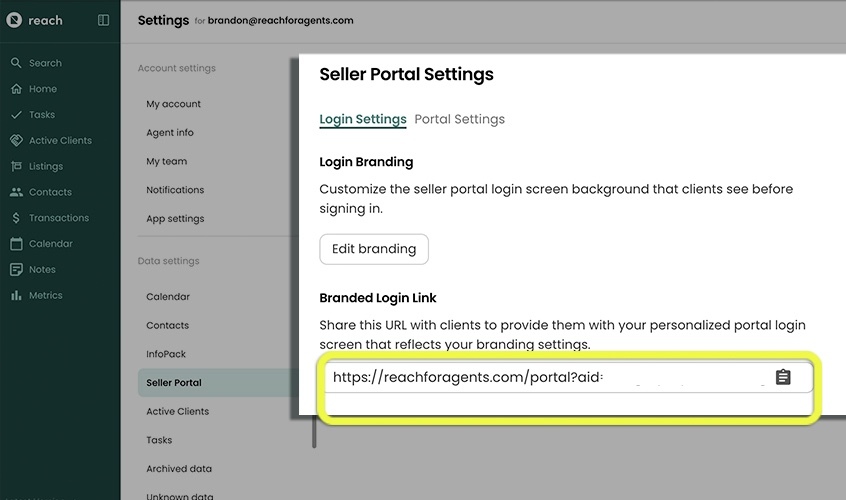
Share your branded login link in your email signature, listing presentations, or anywhere sellers might need to log back in after registering.
If you're really looking for the custom experience, you may be able to embed the portal link on your website as a button!
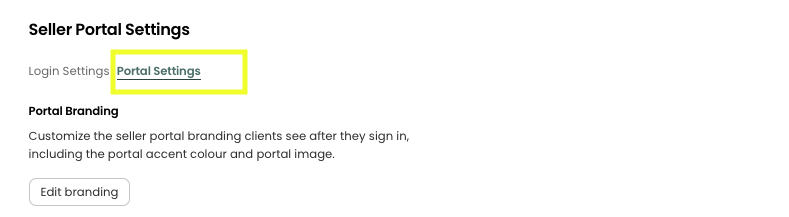
Portal Settings
The Portal Settings tab controls what sellers see after they sign in.
Portal Branding - Live Branding Preview
When selecting "Edit Branding", a full-screen dialog opens with two panels:
- Left panel — A live preview of the portal or login screen that updates in real time as you adjust settings. A callout note explains that the preview uses a sample listing for a fictional client so you can see exactly how your branding will appear.
- Right panel — The editing form with all settings controls.
Changes shown in the preview are not applied until you click Save. Click Cancel to discard any unsaved changes.
Set up your branding before sending your first seller invitation.
Portal Logo
Upload a square (1:1 aspect ratio) logo image. Two display toggles are available:
- Display as circle — Renders the logo in a circular crop (on by default).
- Transparent background — Preserves any transparency in the uploaded image (on by default).
Portal Accent Colour
Use the color picker to select the accent color applied to buttons and interactive elements throughout the portal. Choose a color that matches your brand for a consistent experience.
Categories
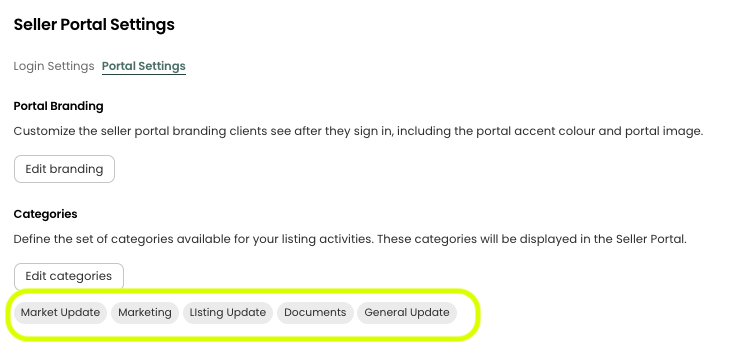
Define the fixed set of Categories available on listing events and portal activities. Categories are shown to your seller as chips beside each activity on their portal timeline — for example "Market Update", "Marketing", "Photography" — and give both you and the seller a fast way to scan the timeline by theme.
Click Edit categories to open the editor.
- Type a category name and press Enter (or the add button) to save it to your list.
- Delete a category by clicking the × on its chip.
- Click Save to persist the set, or Close to discard changes.
If your category set is empty, the picker on listings and events shows "No categories yet"; add at least one here to enable tagging.
On the listing activity and event forms, agents can only pick from the categories you define here — free-typing new categories on individual listings is disabled. This keeps the set of tags consistent across all your sellers' portals. Buyer Identifiers work differently: they are free-form and set per listing.
Teams
Each user can configure their own set of categories. When adding a category on an event or an activity, only the categories of the owner of the corresponding listing will be available to be chosen. This sharing of categories with team members is automatically enabled.
Categories are stored on the user (team-member) record, so each agent on a team can tailor their own set. If you're on a team and want everyone to share the same set of tags, agree on the list and each set it up in your own settings.