Journeys - Powered by Checklists
Your checklists are already your secret weapon — now they can do even more. With email templates built right into your tasks, you can bring clients along on a journey with you.
A journey is the path your client takes — every email thoughtfully timed and delivered as part of your process. Draft once, drop it into your checklist, then Preview → Send directly from the Task Page. That means smoother communication, fewer dropped balls, and every client getting the same consistent (and professional) experience.
Create A Journey With Checklists
First, ensure that you have created the email template you wish to connect to a checklist.
- (Refer to Email Templates for more information)
Open the Checklist or Automated task you wish to link your Email Template within, we call this "Creating a Journey". If Checklist, select the Task within the checklist you wish to add an email template to. If you want, you can create a new task at the bottom of the checklist.
- (Refer to Checklists here to create and/or edit a checklist)
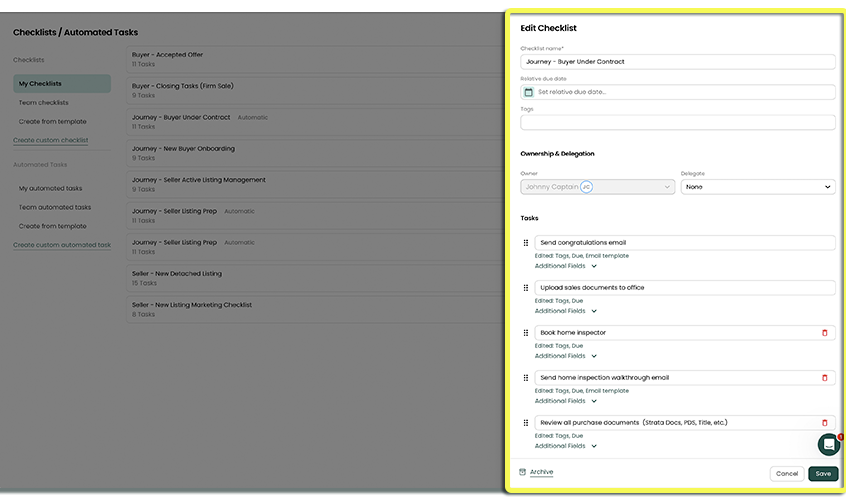
If Checklist, Once you have selected the task (if checklist), you need to select Additional fields to expose additional options
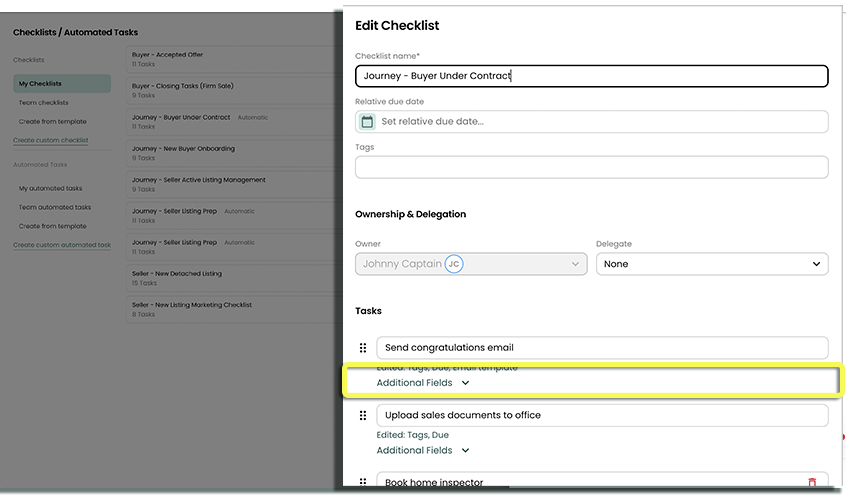
In the area called Email template you will select the Email template you wish to connect.

Once selected, the email template will now be connected. Click Save if you are done with your journey.
 caution
You may see a message displayed "This Email Template is not shared with everyone on your team. Some team members may be unable to use this template for this task." This is to ensure you are aware that your team will only be able to use this email template if you have shared it with them. Both Task Checklists and Email Templates need to be shared.
Using A Journey
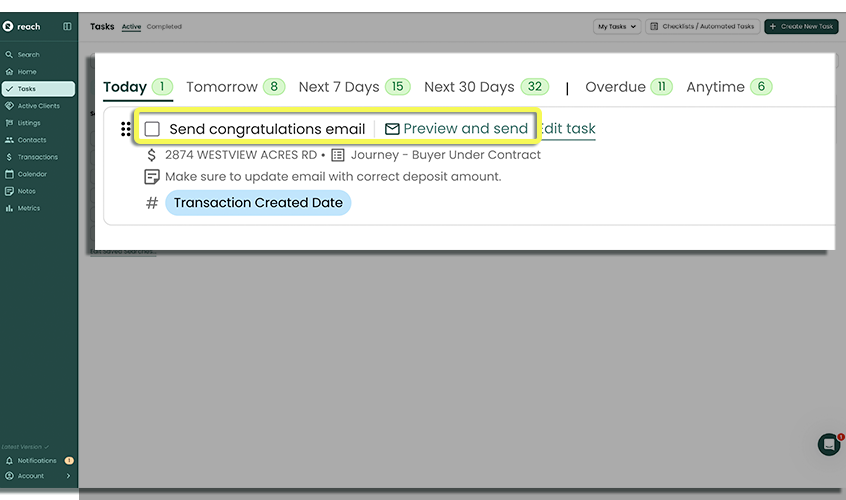
Once you've setup a journey in your checklists or automated tasks, the task will appear in your task page window as "Due" or "Due Anytime" based on your settings. This journey (task w/email) will appear different than the rest of your tasks, as it will have the ability to Preview and Send
Preview and Sending
We strongly believe agents are important in the real estate journey. Our goal is to not automated everything in an agent's daily life. We want to remind, and allow you to customize a message or preview before you send, so that you know exactly what you are sending, to whom, at all times.
Your task will appear "due" with the ability to click Preview and Send
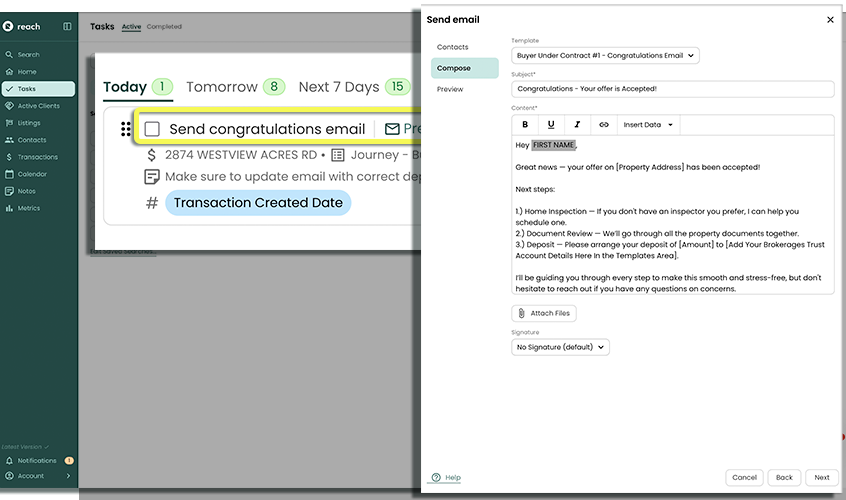
From the task, click Preview and Send
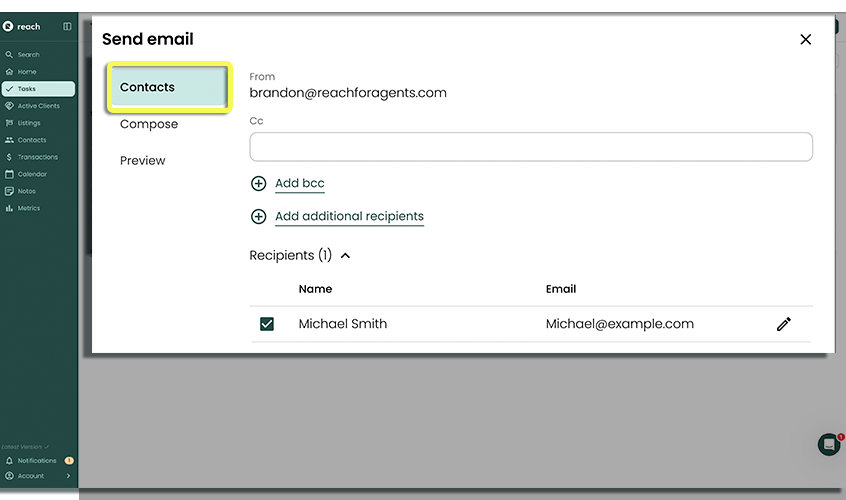
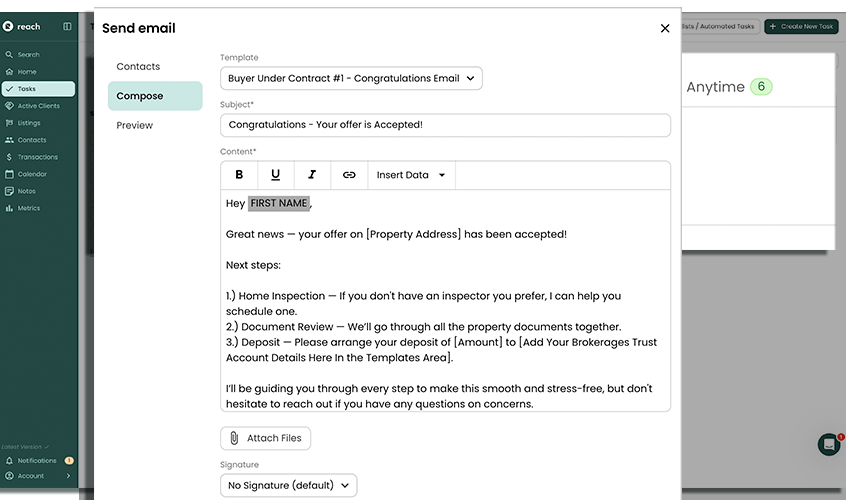
This will launch the preview window, that will allow users to:
- Compose - You will see your original email template content displayed in this box, including the Subject Line (and template selected). You can make changes to the Subject and Content as needed.
notePro Tip! Some users have placeholders in their templates, to remind them to put a specific item or value in, on each personal email (such as the Address, or the $ Amount). This can be done using any type of character that you need, ie: "XXXXXXXXX"
Preview - This shows you how a recipient will receive your email. Ensure correct email signature, etc. you can even use the arrows to scroll through multiple email addresses (if more than 1 contact is selected).
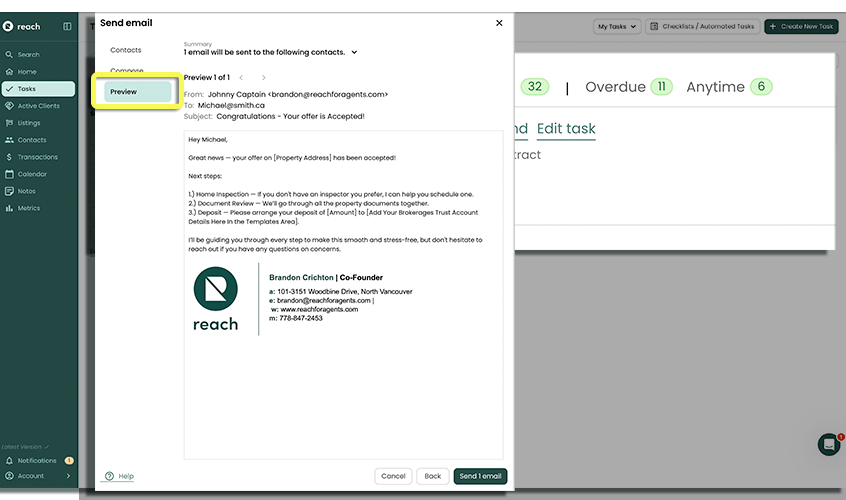
Edit Recipients (contacts) - This area lets you add additional contacts (perhaps from the Group)