Sending An Email
📽 VIDEO: Sending Mass Email
With Reach, you can send emails one-to-one or to a group of contacts— whether it's clients or agents. Compose a message on the spot, or save time by using a template you’ve already set up.
Reach does NOT send out a single email that is BCC'ed to all recipients. It sends out MULTIPLE emails, one for each recipient. If you check your Outlook/Google sent folder, you will see all the emails sent.
- (Refer to Email Settings for help setting up your emailing account)
When composing an email in Reach, your emails will be sent from the default email provider configured in your Email Settings. You can connect multiple Google, Microsoft, or SMTP accounts and choose which one acts as your default sender.
*If you are signed in with an Admin account, regardless of whether you are "Acting As" another team member, you still send emails out using your account's default provider.
Selecting contact(s) to email
Multi-Contact Selection:
The first step of composing an email is to select your recipients.
In the sidebar, click on Contacts
Optionally apply a filter to find the clients or agents you want to send an email to
Use the checkboxes to make a selection of multiple contacts
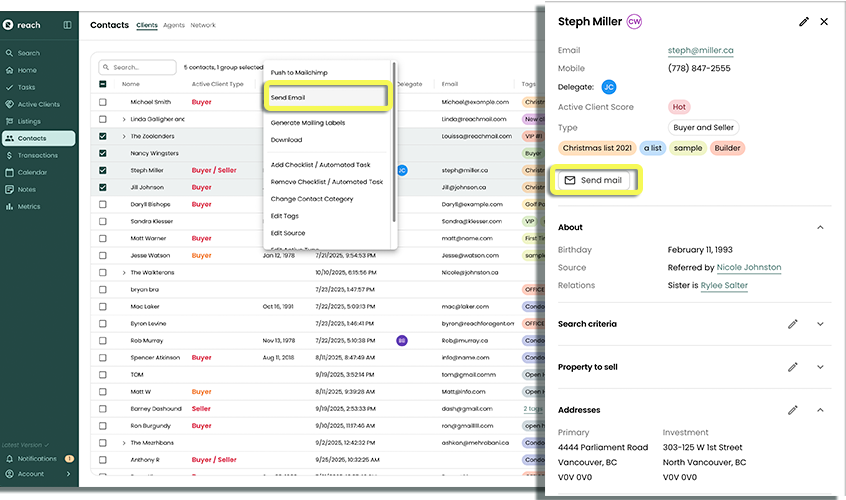
Select the hidden 3-dot menu item (...)
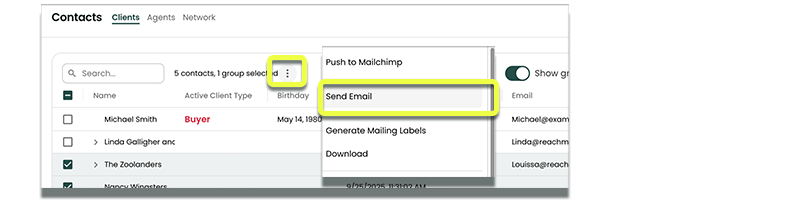
Click on the Send Email button that appears
You must Grant Reach access to send emails on your behalf if you have not previously granted this permission. If you have not set this up, you will be prompted to at the initial send stage.
Single Contact or Group Quick-Send:
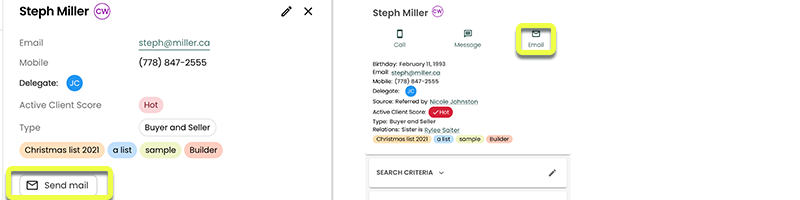
You can quickly select "Send Email" button from any Contact, directly when the contact has been selected. The Contact must have an email address in their details, in order to have this option available.
Agent Emailing
You can email a single agent, or multiple agents within Reach (providing they have a stored Contact in Reach, with an email address).
Under Agents, select the agent you wish to email and click the "Email" button on their contact card
Select multiple agents via the Agents database list, and click (...) and select "Send Email"

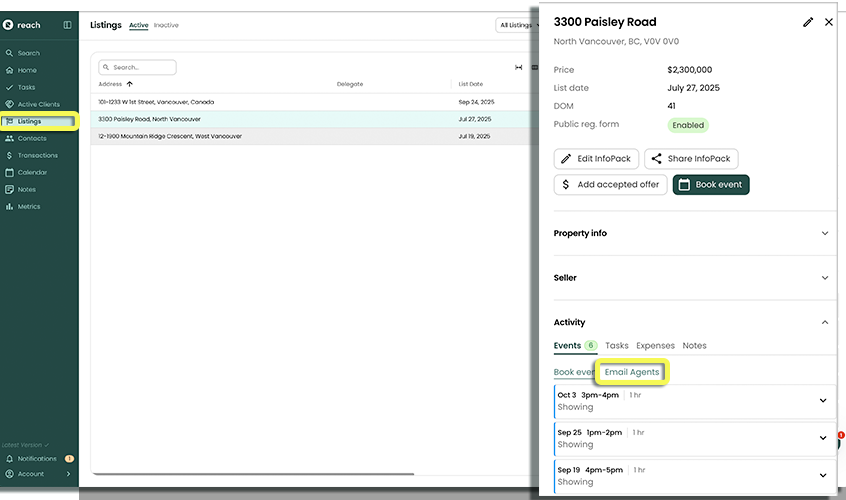
In the Activity of a Listing you have the option to mass email all the Agents that have had booked events associated with them. This will prompt a mass email to all agents linked. (Refer to Booking Events, for help on booking events and linking agents)
Before Email - Review Contacts
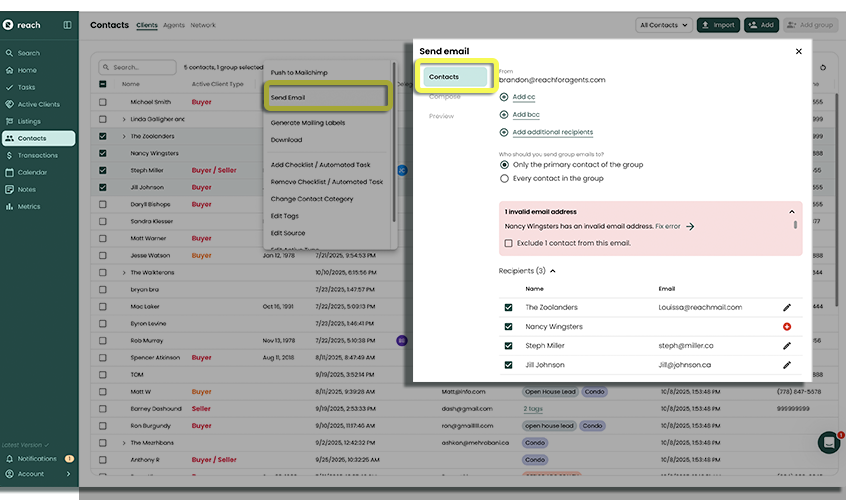
This step allows you to review the contacts that have been selected. Any errors will be displayed and prevent you from advancing to the next step. For example, selecting more than the allowed number of recipients, or selecting a contact that does not have an email address.
- Reach identifies what email address will be Sending the email (confirmation of the account that will send from)
- If applicable, add CC or BCC fields to your email.
- If applicable, add additional recipients.
- Groups: If applicable, decide if you wish to send a single email to the primary contact of each group, or emails to each member within each group
- If applicable, add any missing emails using Review and Fix
- If there are still errors, select the checkbox to ignore the invalid contacts
Once you have resolved all errors (or decided to ignore the contacts that don't have email addresses), you can advance to step 2.
Step 2: Compose
Now that you have selected your recipients, the next step is to compose your email.
- Optionally select a pre-configured Template - Learn how to configure templates
- Specify the Subject of your email
- Write the body of the email. Formatting options of bold, italic, and underline are available.
- Use the Insert button to insert a placeholder for the recipient's first or last name
- Optionally, attach any attachments.
- Optionally use a pre-configured signature - Learn how to configure signatures
Once you have composed your email, it is now time to preview how it will look!
Step 3: Preview
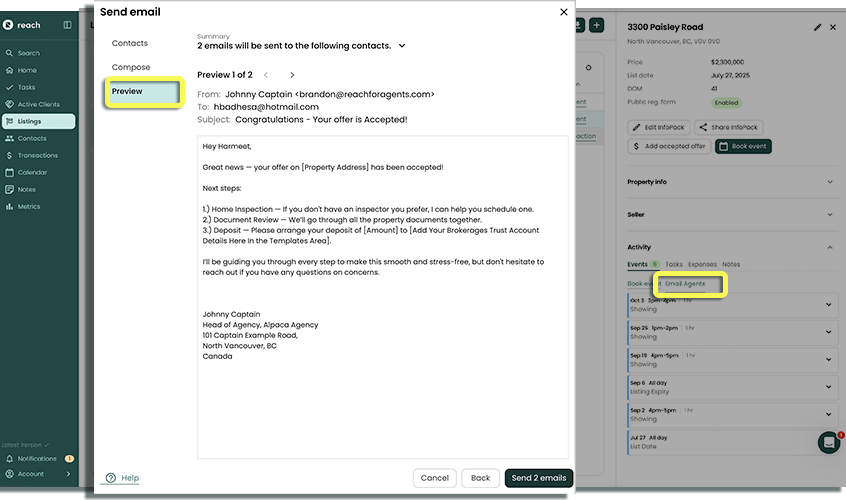
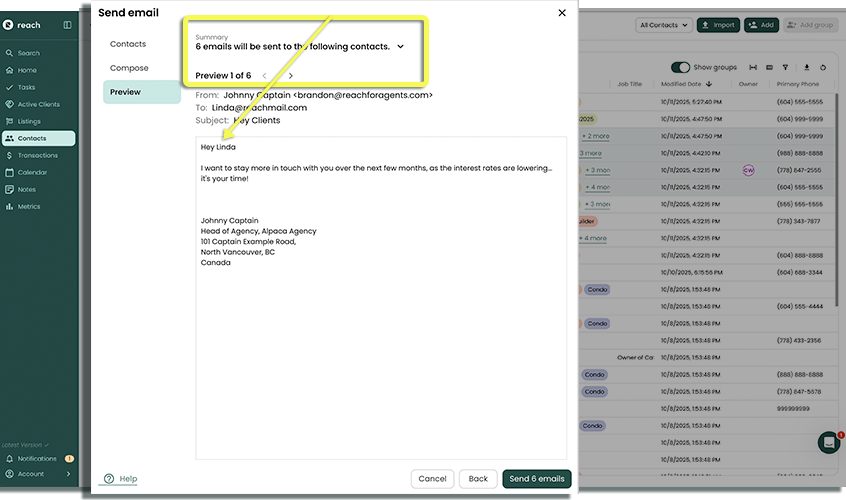
Because Reach will send out multiple emails, one to each recipient, it is important to preview how the email will appear.
To change the name that appears in the "From" field, go to Settings -> Agent Info to change your settings.
- Use the < and > icons to cycle through the emails
- Observe the "To" field is correct (this is how it will appear to the recipient)
- Observe that the "First Name" and "Last Name" placeholders have been replaced with the actual first name and last name of the recipient.
- If applicable, verify your signature is correct
Once you are happy with the preview, click on Send
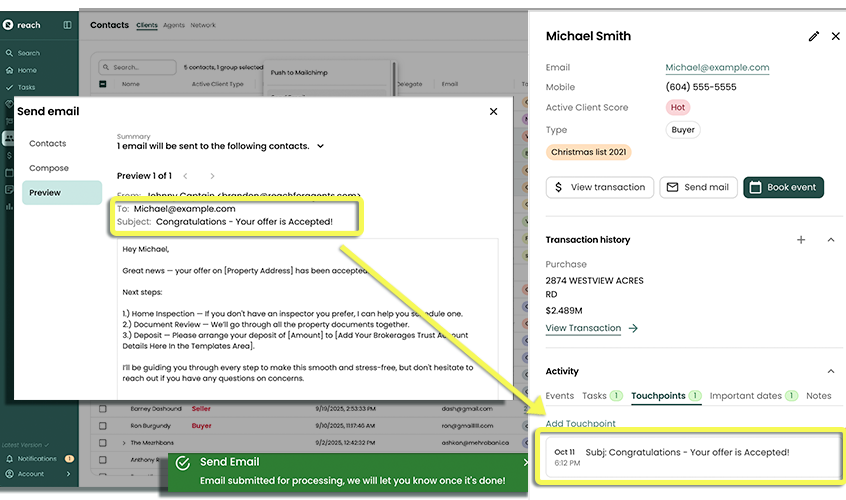
Step 4: Results
Because Reach sends out email from your email address (rather than Mailchimp or another 3rd party service), all sent emails will be viewable in your email client's "Sent" folder.
If there are no errors, a simple success message will be shown and you are done! As a helpful reminder, Touchpoints are automatically created for each recipient with the subject of the email as the Touchpoint title.
If there are errors, the dialog will display a list of email addresses that were successful and a list of emails that failed along with any detailed information about the type of error. The error message may include instructional information for you to try again.