InfoPack™ Template Settings
The InfoPack™ Template Settings lets you set default configuration that is used for all of your InfoPacks™.
Designs, Branding, and Disclaimer
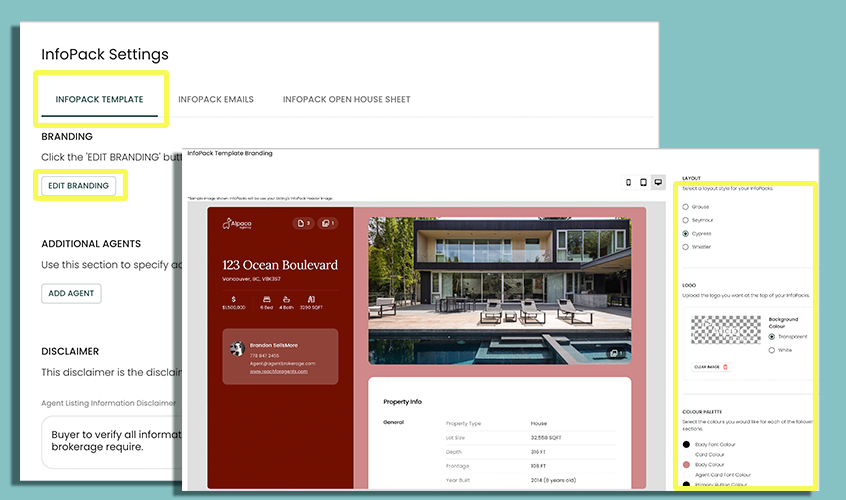
Here you can control your InfoPack branding, and select 1 of 4 Design Templates to use (Grouse, Seymour, Cypress and Whistler).
You can upload your real estate logo here, and see how it quickly applies and appears in the sample “Preview” to the left.
- Click Settings
- Click InfoPack (Under Data Settings)
- Select InfoPack Template along the top tabs
- Click Edit Branding
You can preview what your InfoPack will look like in Mobile, Tablet, and Desktop devices.

Add Additional Agent
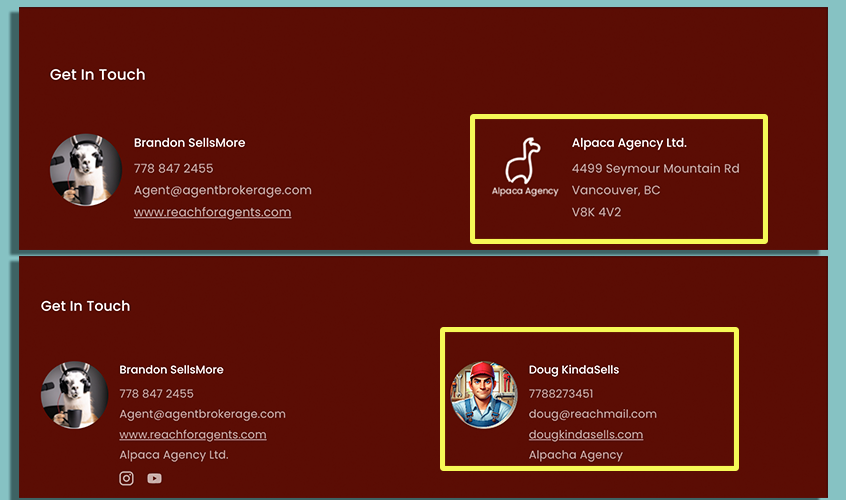
This option allows you to add a team member, or another agent who you want to be represented on all of your InfoPacks. This option will override your Brokerage Logo details with the name, details and image of your Additional Agent.
- Click Settings
- Click InfoPack (Under Data Settings)
- Select InfoPack Template along the top tabs
- Select Add Agent
- Completely fill out the Additional Agent details, including uploading an image.
- Click Save
The below image shows the difference between Brokerage Info (on right) or Additional Agent (on right).
To remove the Additional Agent, simply go back to the Additional Agents in settings, and remove that additional agent. This will put back in your brokerage information automatically (providing you have added that information in your "Agent Info").

Adding a Disclaimer
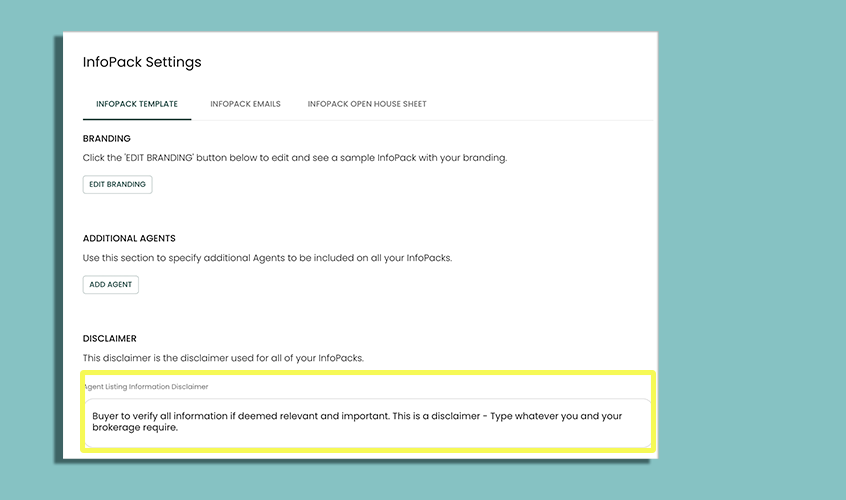
You or your brokerage, or real estate board, may require a disclaimer to be present on all your marketing material. If this is the case, you can enter in a Disclaimer that will be present in the footer of all your InfoPacks.
- Click Settings
- Click InfoPack (Under Data Settings)
- Select InfoPack Template along the top tabs
- Type your required Disclaimer in the section provided
- Click Save
