Create and Edit an InfoPack™
📽 VIDEO: Create, Manage, and Send InfoPacks
The Reach InfoPack™ is an easy way to share all of the important information about your Listing with Selling Agents. Easily communicate property details, suite included items, tenant information, strata documents and more!

Create / Edit an InfoPack™
Reach will automatically create an InfoPack™ for any Listing that you have in your account. Some of the Listing information is pre-populated added automatically (e.g. address, price, bedrooms, bathrooms, sqft, location, property type). From there, you can edit and update as much information as you prefer. Remember the more information you provide, the less hassle and phone calls you get from Selling Agents!
- In the sidebar, click on Settings
- Select a Listing to open its details
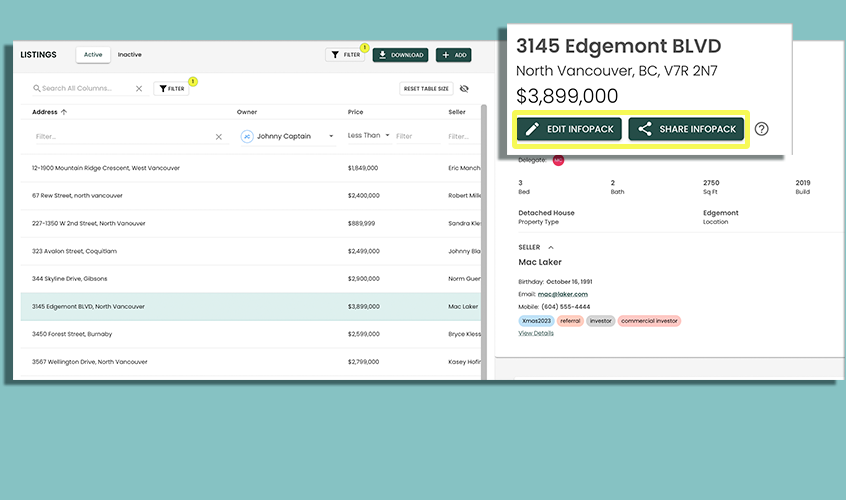
- Click the "Edit InfoPack" button
- Follow the menu on the left to input all the correct information. Any fields left blank will not appear in the InfoPack.
- Click Save to save your changes
Add a Listing Image to an InfoPack™
When editing an InfoPack, go to the "Header Image" section to add a Listing Image.
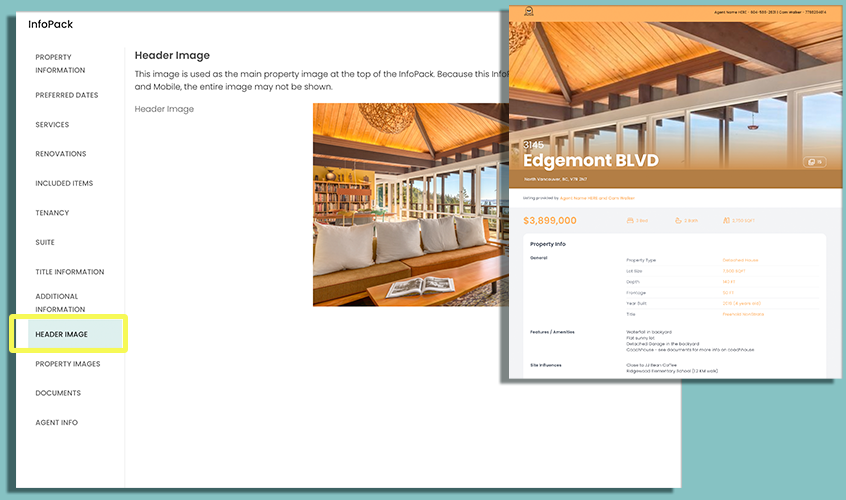
Import and attach an image of the Listing you wish to display in the header of the InfoPack. This image will also appear in the body of the email that is sent out (if sending via Reach email). You can use the crop tool to make any changes before saving your image. For best results, try and upload an image less than 5MB in size.
Because InfoPacks need to be displayed on various screen sizes, the entire Listing image may not be shown.
Upload Property Images
You can only upload images less than 5MB in size.
When editing an InfoPack, go to the "Property Images" section to add multiple property images.
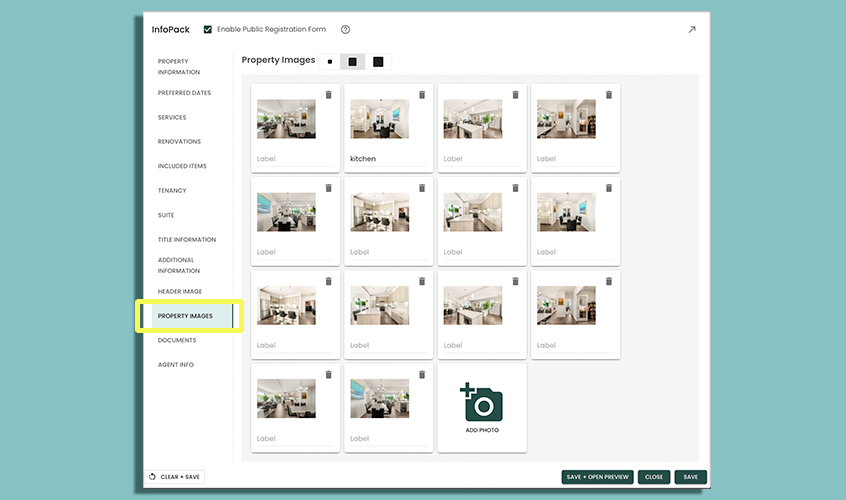
Import and attach multiple images for display in the image carousel in the InfoPack™ (accessed when clicking on the main listing image). Images can also have optional descriptions if you want to provide more clarify for your users (e.g. Bedroom 2).
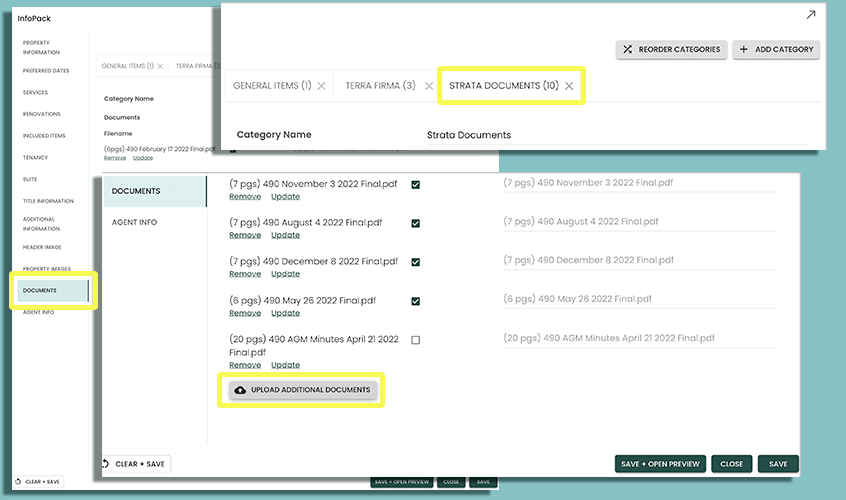
Upload Documents
Only PDF Attachments are currently supported
Reach offers users its own document storage and sharing for InfoPack. Upload all your important strata documents, title documents or anything you need to share with agents. You can categorize your documents into as many custom categories as you wish.
Save early and save often!
Follow the instructions below to upload documents:
- When editing an InfoPack, go to the "Documents" section to upload documents.
- By default, your first category is called "General". You can change this name at any time by editing the "Category Name" field
- Click Upload Documents and select what documents to upload.
- Reach supports multiple file uploading, so you can select multiple files for a category folder, and upload.
- Mark any documents you want available as public (e.g. documents you want available to people who scan the Open House sheet).
By default, documents are not public. To make documents available to the general public (e.g. prospective buyers at your Open House), mark the document as "public"
Click to Show Image
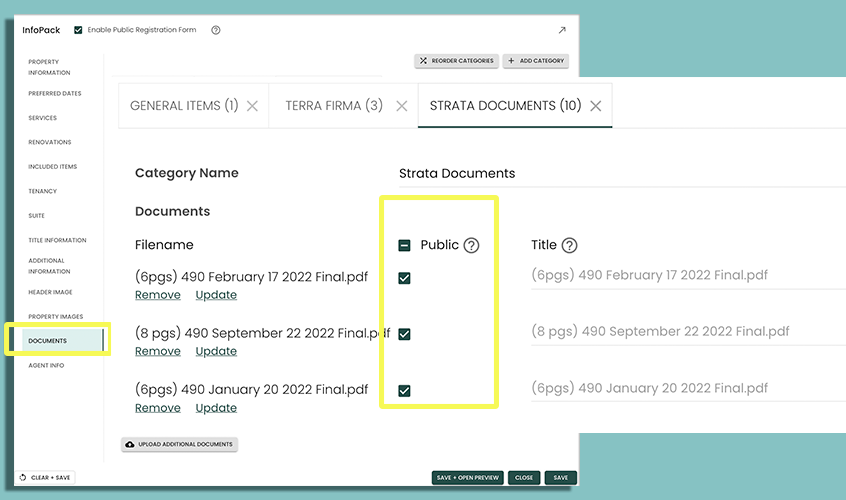
- Click +Add Category to create an additional category.
- Click on the "New Category" tab to rename the category to something more descriptive
- You can optionally add a friendly description for each file that is uploaded. Descriptions are helpful if the filename is cryptic and hard to understand. If no file name is entered, Reach will automatically assign the file name as the description.
- When finished, click Save.
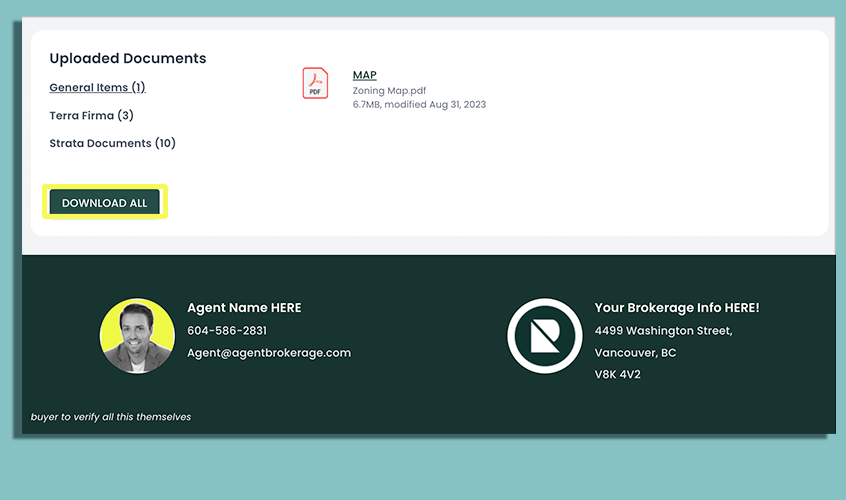
Anyone who receives an InfoPack™ is able to view associated documents in their browser, as well as "Download All" into a folder on their desktop or mobile device.
Preview InfoPack™
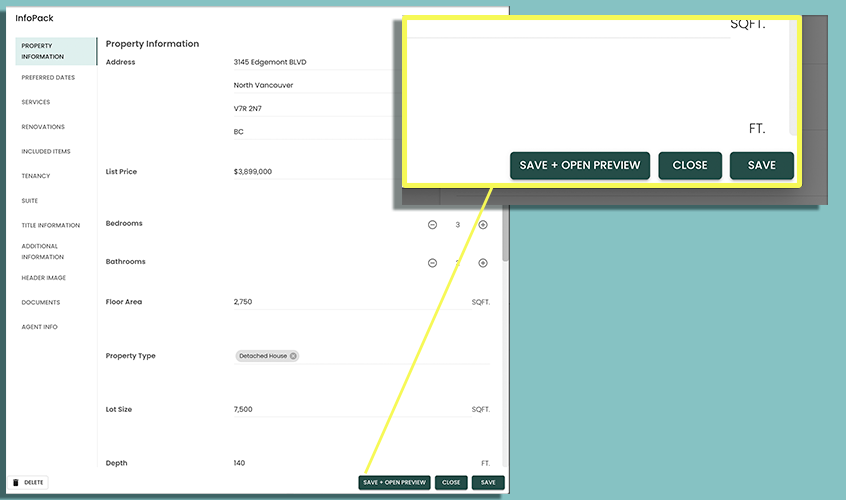
While editing your InfoPack™, you can preview it at any time while editing your InfoPack™ by selecting "Save + Open Preview" along the bottom right. This will open up in preview mode. Simply select "Close preview" in the corners to return to the edit screen.
Public InfoPack™ Registration Form
If you have External Lead Capture disabled, you will not able to use registration forms on your InfoPacks™.
A public InfoPack™ can first require recipients to enter contact details (name and email) before they can access the InfoPack™.
To enable the registration form for the public InfoPack™, follow the instructions:
- In a Listing's details, click on Edit InfoPack
- In the header of the dialog, make sure the Enable Public Registration Form checkbox is checked
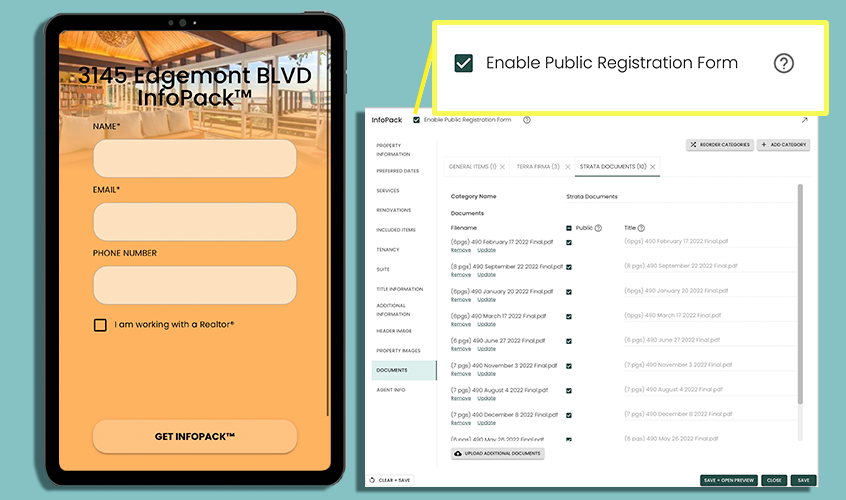
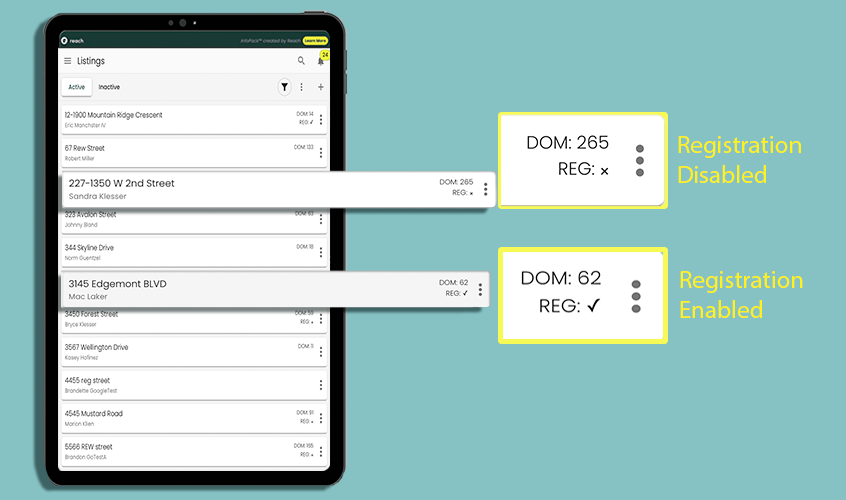
The registration form's enabled / disabled status can be seen on the Listings page and on the Listing's details page.
Click to Expand Image

Now that you can configure a public InfoPack™ with a registration form, you can still send out individual links that bypasses the registration. See Share An InfoPack for details