Accepted Offer
All thanks to your skill, you've landed an Accepted Offer on your client's home. Now it's time to monitor that Listing to ensure it goes smooth (for your own sake and your client's).
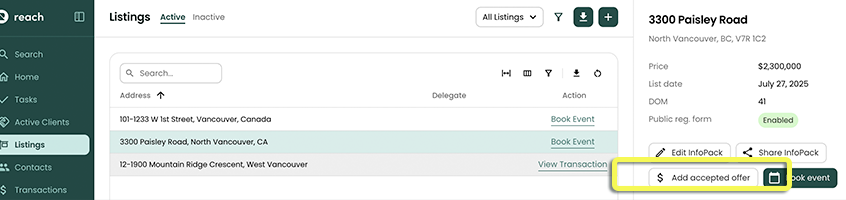
In the sidebar, click on Listings
Select the Listing you want to create an accepted offer for
From Listing's details, click the Accepted Offer button
The Add Transaction form will appear pre-populated with the Listing's address and the Seller
- Enter any applicable dates
The Subject Removal date is only required if the Status is a Conditional Sale
If there are no subjects, the Completion and Possession dates are required at this time
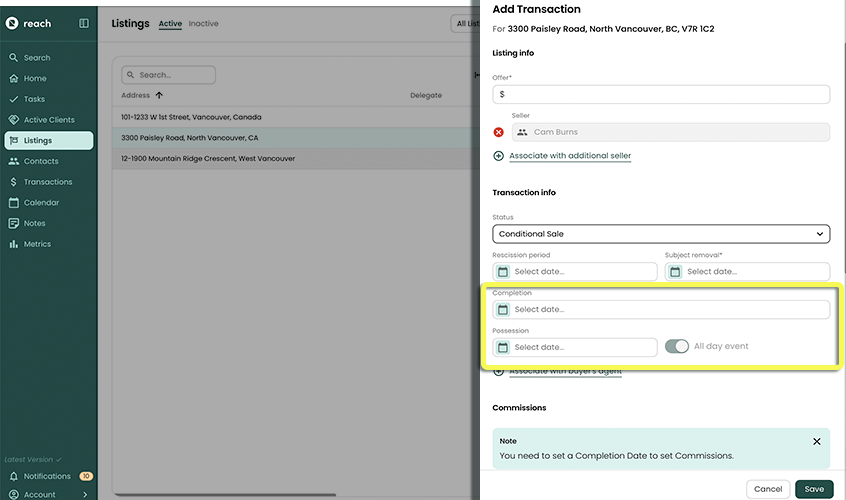
BC Residents can also enter the Rescission Period Date. Don't see it? Make sure you have your province is set to BC in Settings -> My Account (Business Address section)
If there are no subjects, the Status can be set to Firm Sale, otherwise leave it as Conditional Sale
Add any Checklists if applicable (we highly suggest creating some Checklists if you haven't - there's probably things you do for every accepted offer, right?)
(Refer to Checklists and Automated Tasks for all this information)
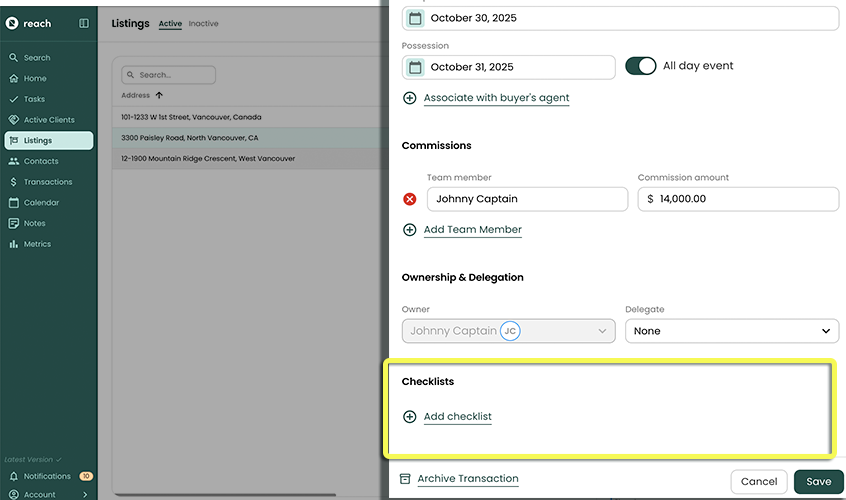
Click Save
Note - Any dates that are inputted here (Rescission, Subject Removal, Completion and Possession) they will automatically create events in your calendar that are linked to this Transaction. It’s that simple!
In addition to a new Transaction in the Transactions page, your Listing has a new View Transaction link. Similarly, your Transaction will have a View Listing link.
![]()
Congrats on getting almost there with the sale!