Manage A Portal
Portal Status
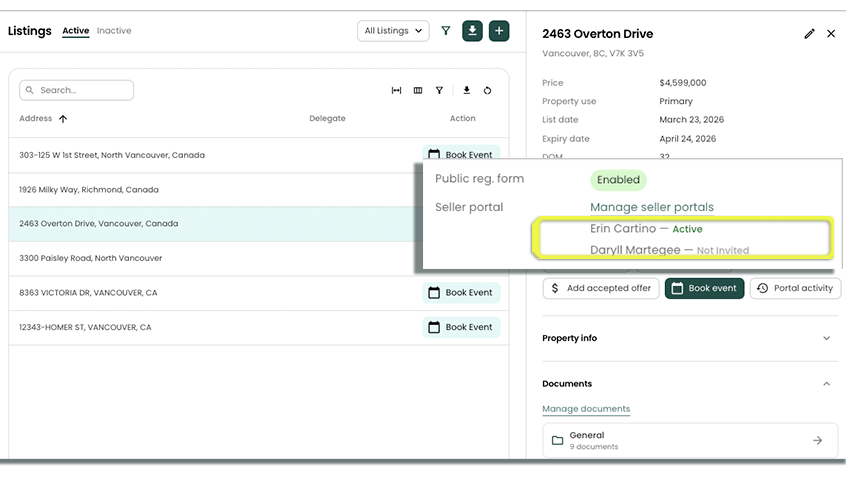
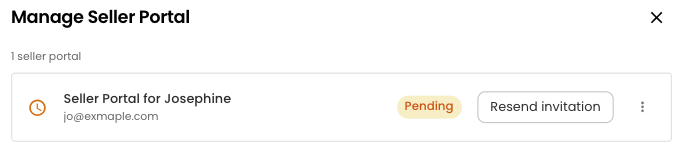
Each Seller has a Seller Portal Status shown on their Contact page, and located on the Listing page.. The status is color-coded, as per below to indicate the status of your sellers portal activation.
| Status | Color | Meaning |
|---|---|---|
| Active | Green | The seller has registered and can access the portal |
| Pending | Orange | An invitation was created but the seller has not yet registered |
| Disabled | Red | Portal access has been revoked |
| Not Invited | Grey | No invitation has been created yet |
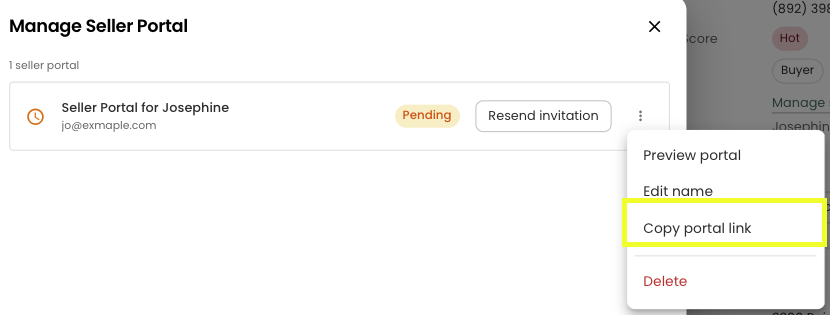
Click Manage seller portal to:
- Click Send invitation to your seller portal (if the Seller has not been activated yet)
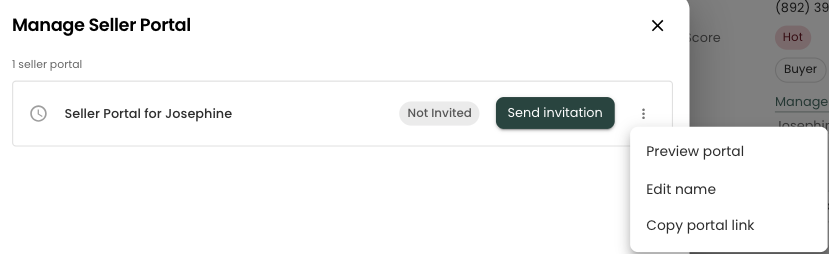
Preview their Portal (This gives you the ability to see what they see)
Edit their Display Name "Edit name"
Copy the Portal Link (used, if they misplace their link)
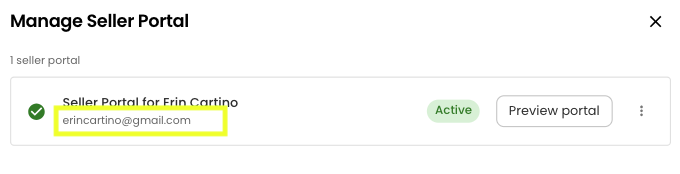
View what email address they have used to register for their portal.
Inviting a Seller
You must initiate the Seller invitation process, before your Seller can access their portal
To send your client an automated email with their registration link, follow these steps. Reach will generate an email with the "magic" link for the clients Portal and Portal Registration.
Option 1: Send an Email Invitation
Open the contact's detail page and click Manage seller portal (or from the listing page).
Click Send invitation.
In the dialog that opens:
- Confirm or enter the seller's email address (pre-filled from the contact record if available).
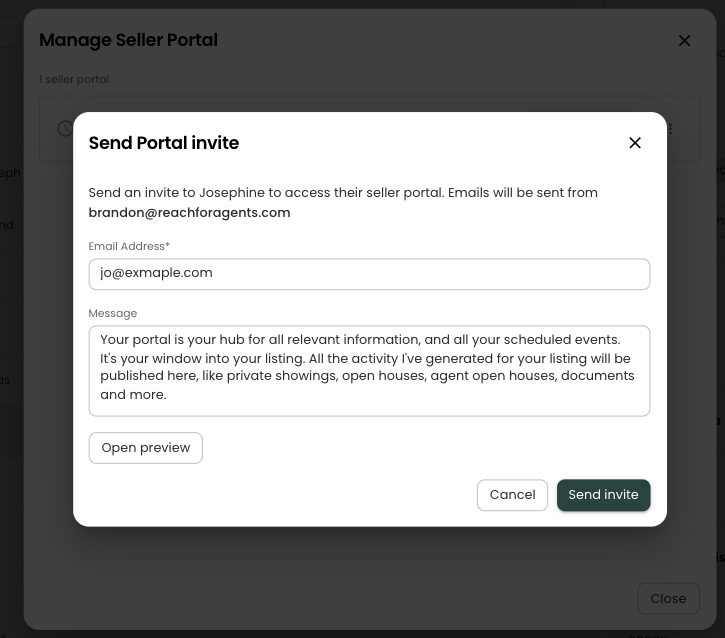
- Customize the Message field — it is pre-filled with a default invitation message, but you can edit it before sending.
Optionally click Open preview to see exactly how the email will appear in the seller's inbox before sending. NOTE: We have hard coded some specific information in the email that is not editable.
Click Send invite.
On success, an "Invite sent" confirmation appears and the contact's status updates to Pending.
Invitation emails are sent from your connected Gmail or Outlook account, giving the message a personal touch.
If delivery fails, a notification displays the error and the dialog stays open so you can correct the address and retry.
Option 2: Copy the Portal Link
If you prefer to share the invitation another way (text message, WhatsApp, a personal email), click Copy portal link from the three-dot menu on the contact's row. The registration URL is copied to your clipboard and a confirmation message appears. The seller uses this link to create their account and access the portal.
Managing Access
Disable Access
To temporarily suspend a seller's access to their listing information without removing their data, use the Disable option from the three-dot menu. The contact's status changes to Disabled. The seller can log in, but no listing information will be shown.
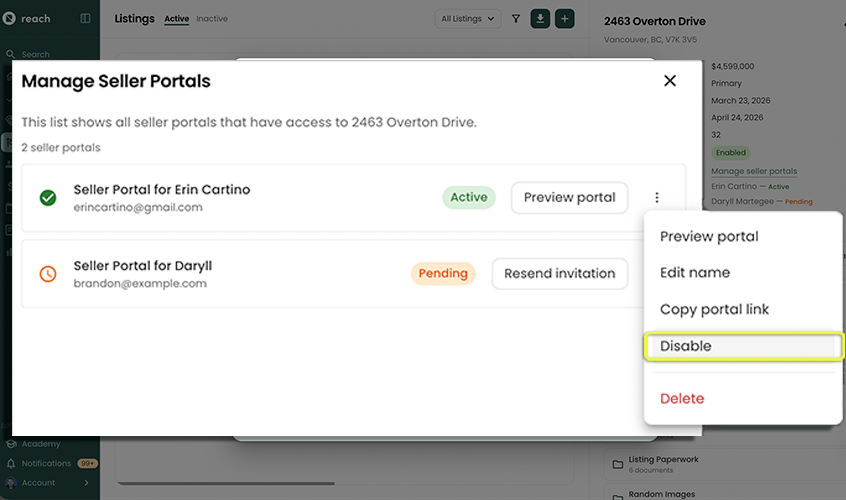
Enable Access
For a Disabled contact, click Enable to restore their access immediately. The status updates to Active.
Delete Portal Access
To permanently remove a seller's access for their listings, select Delete from the three-dot menu (...) from their contact inside "Manage Portal".
You will be asked to confirm before the action completes. Once deleted, the contact's status reverts to Not Invited and the seller's account is removed. While the client can still log in to portal, no listing information will be shown; you will have to send your client a new invitation for them to regain their access to their listings.
