Integrations
Reach integrates with other popular online services that you already use!
Dropbox
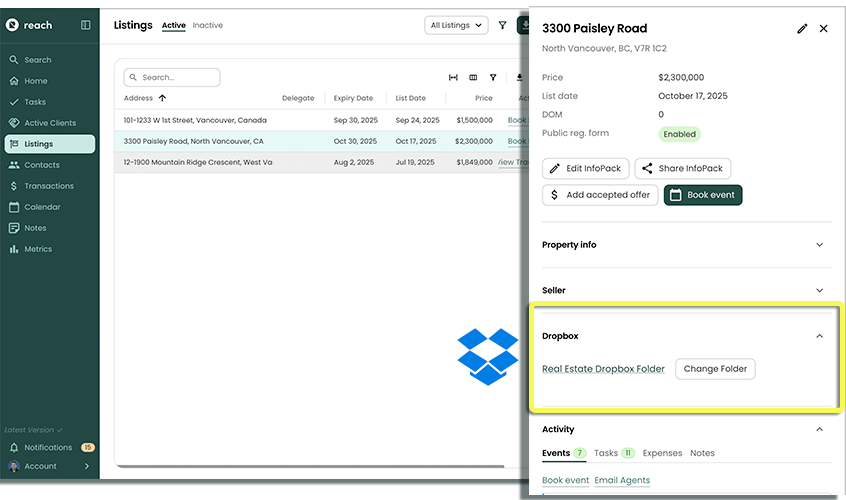
Reach integrates with Dropbox to give easy and quick access to your Listings' documents. Each Listing in Reach can be assigned a Dropbox folder; any documents in that Dropbox folder are listed when viewing a Listing. Simply click on a document to view it or click on the Dropbox folder link to open the folder in Dropbox.
Setup
Reach requires access to your Dropbox content on your behalf.
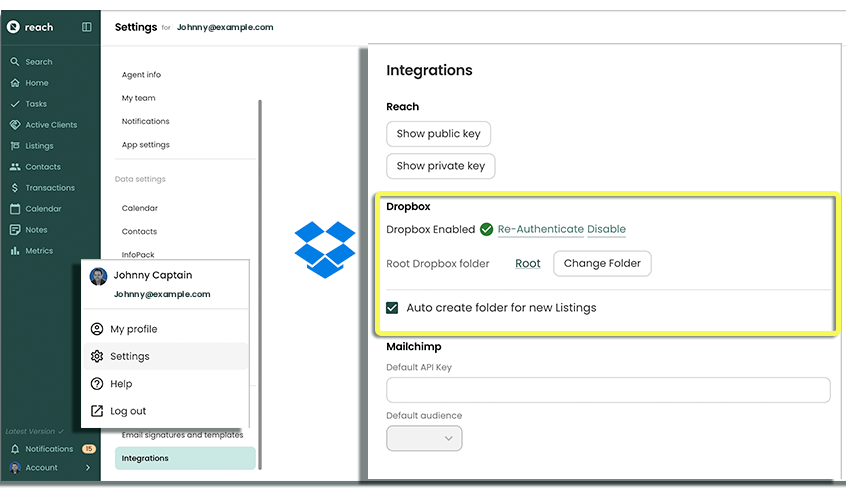
- Open Reach and in the sidebar, scroll to the bottom and select Account, then Settings
- Click on Integrations
- Click on the Enable Dropbox Access button
- In the new browser tab that opens, accept the permissions within Dropbox, to allow Reach to Create and fetch information back and forth.
- The new browser tab will automatically close and bring you back to Reach saying that Reach now has access
- Click Save
🚀 "Root" may be assigned so that any new folders created in Reach (ie "3330 Paisley Drive") will be put directly in that first folder. BUT... you can change that to any folder you want Reach to create folders into
Once you have granted access to Dropbox for Reach, you can either re-authenticate or remove access if required.
Auto Create Dropbox Folders
If you do not enable auto-creation, Reach will prompt upon the creation of a Listing whether you want to create a new Dropbox folder. In either case, the creation of Dropbox folders from Reach requires the "files.content-write" scope
Reach can optionally create a new Dropbox folder for each new Listing. A folder with the address of the Listing will be created in the designated root folder. You can change the root folder in your Reach settings.
- In the sidebar, click on Account then Settings
- Click on Integrations
- In the Dropbox section, click on Change Folder
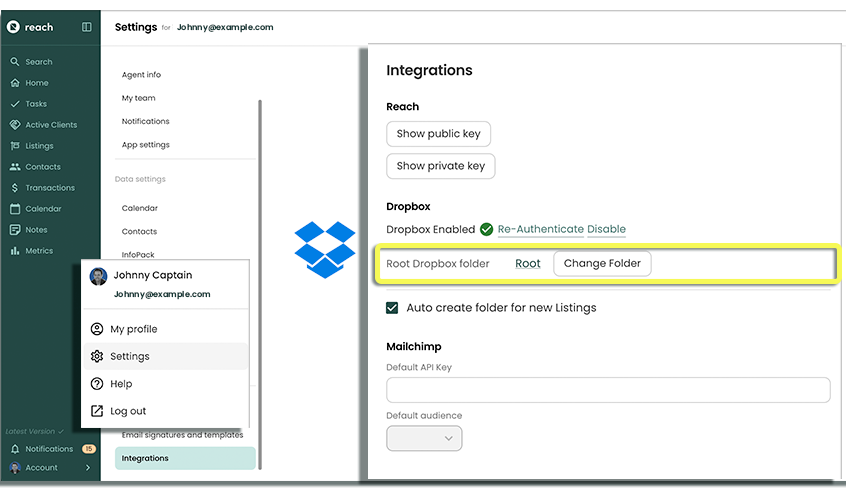
- Navigate to the folder you wish all new Listing folders to be created under
- Click on the folder name
- Click Select
- Click Save
Any new Listings will now automatically create a new Dropbox folder for all your Listing-related documents!
Mailchimp
Reach allows you to periodically sync your Contacts with one of your Mailchimp Audiences. When the sync process is initiated, any Contacts whose emails are not found in the selected Mailchimp Audience are added to your Mailchimp Audience.
Get a Mailchimp API Key
The below instructions are estimates and subject to change based on 3rd party software like Mailchimp. For technical support please contact Mailchimp directly to resolve
Reach requires access to your Mailchimp account on your behalf. You need to provide Reach an API key to accomplish this.
- Log in to your Mailchimp account
- Navigate to your Profile (click in the circle in the bottom left corner and select Profile from the menu)
- Click on the header labeled Extras and select API Keys

- Scroll down to Your Api Keys
- Click on Create A Key to create a new API key.
- Give your new API key a name
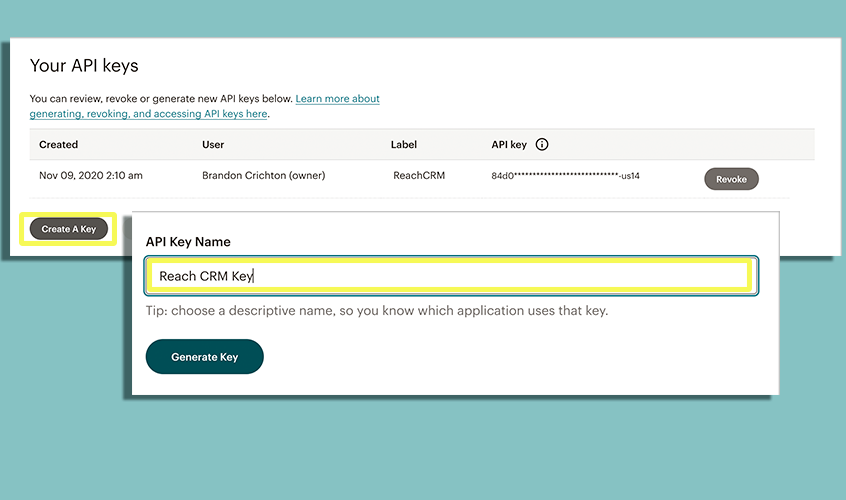
- Copy your newly created API Key
- To have Reach store this key for you, read Default Configuration below.
Default Configuration
Syncing your Contacts requires your Mailchimp API key. You can either enter the API key each time you sync, or you can store it in Reach so that you don't have to manually enter it every time. Continue the instructions below to store your Mailchimp API key in Reach.
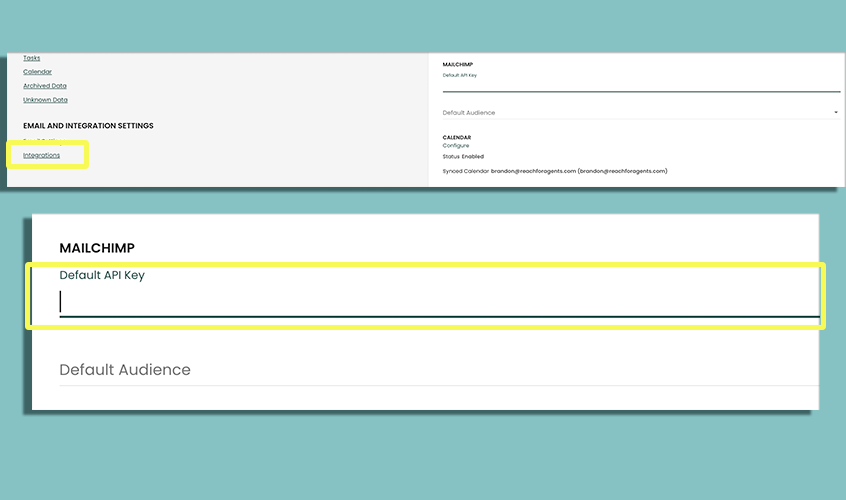
- In the sidebar, click on Settings
- Click on Integrations
- Put the API Key you copied from Mailchimp into the Mailchimp Default API Key field
- Click on the Default Audience field to select an Audience (you may need to wait a few seconds for options to appear)
- Select the Audience you wish to sync your Reach Contacts with
- Click Save
Syncing Contacts
To sync your Contacts with Mailchimp, follow the instructions on the Sync with Mailchimp page